Tenant Management
This section describes the steps to add a new tenant and provides an overview of Platform tenant controls. The Tenants page is the first screen after entering Platform.
Adding a new tenant
Attention
Only a user with the System Owner role can add a new tenant.
Creating a tenant is required to add workspaces and instances of PostgreSQL to it.
To add a new tenant, follow these steps:
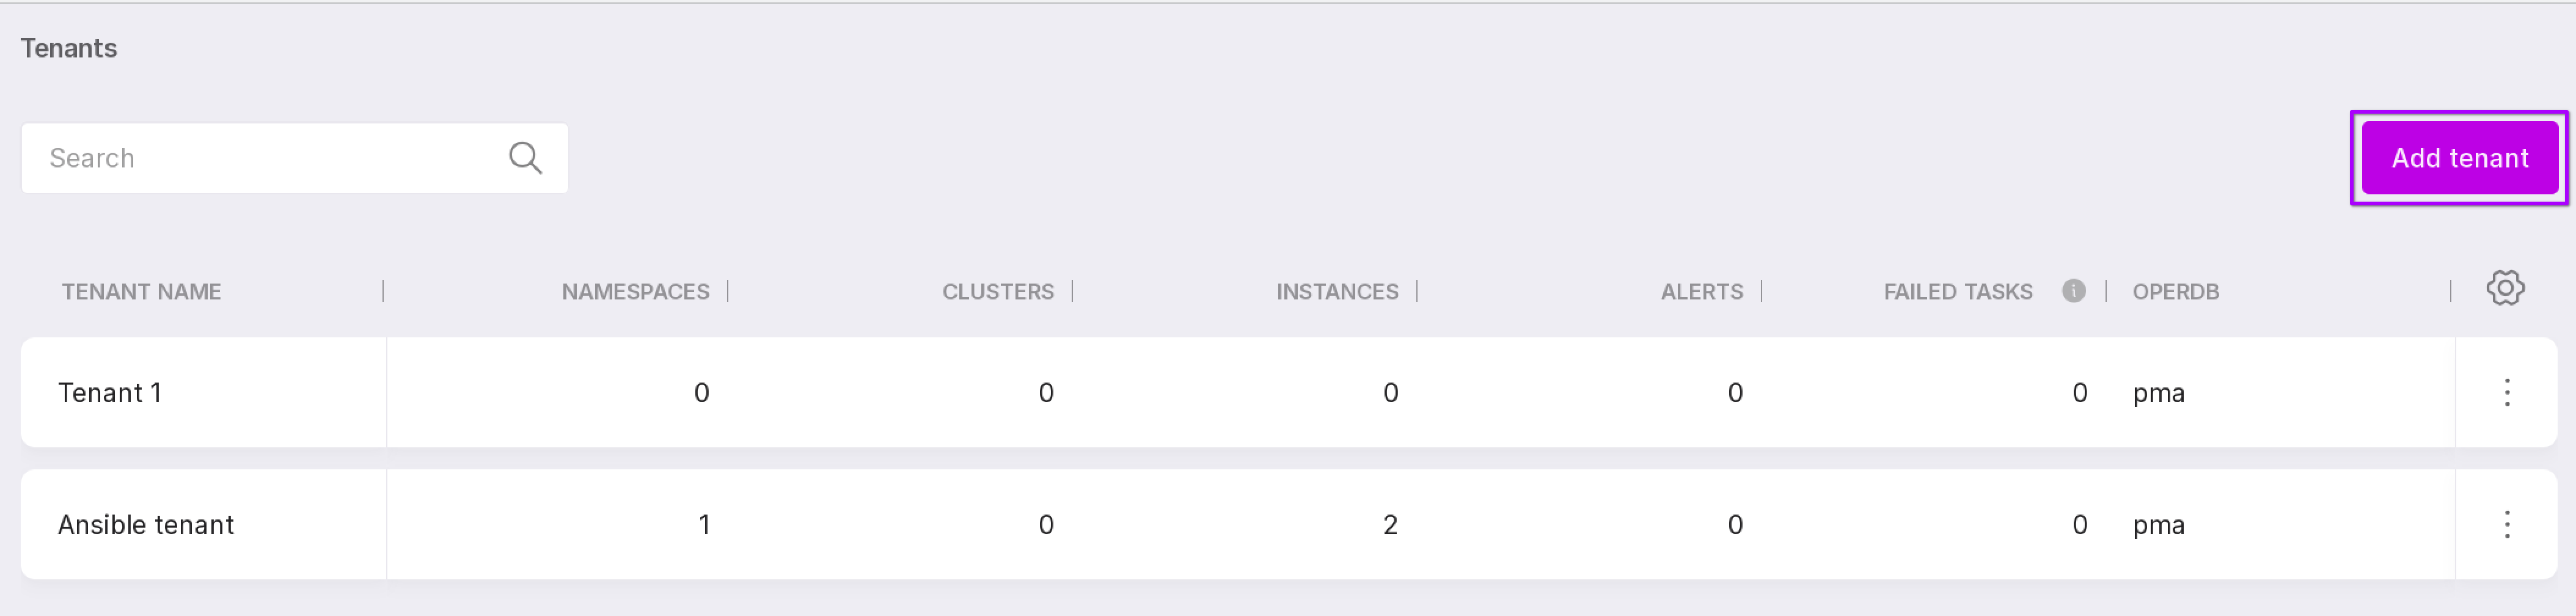
On the Tenant page, click “Add Tenant”.
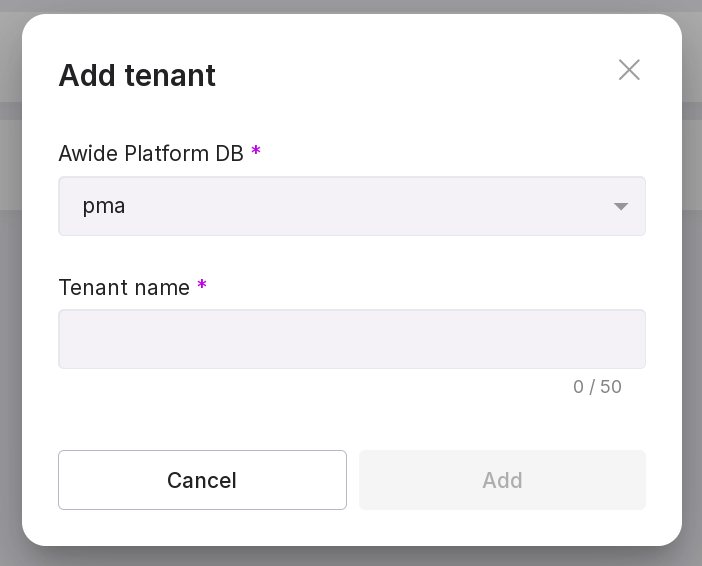
In the modal window that opens, select Awide DB, enter the name of the Tenant in the “Tenant Name” box and click on the “Create” button.
Once you have completed these steps, the page will display a new line with a tenant within which you can create namespaces.
Tenant Control Elements
Consider the controls as numbered in the figure below:

A search bar that allows you to search for tenants by name.
Information on Tenants:
“Tenant name” is the name of the tenant;
“Namespaces” is the number of namespaces inside the tenant;
“Clusters” is the number of clusters within the tenant;
“Copies” is the number of copies inside the tenant;
“Alerts” — number of alerts received for this tenant;
“Failed tasks” is the number of tasks created per tenant that were not successfully completed.
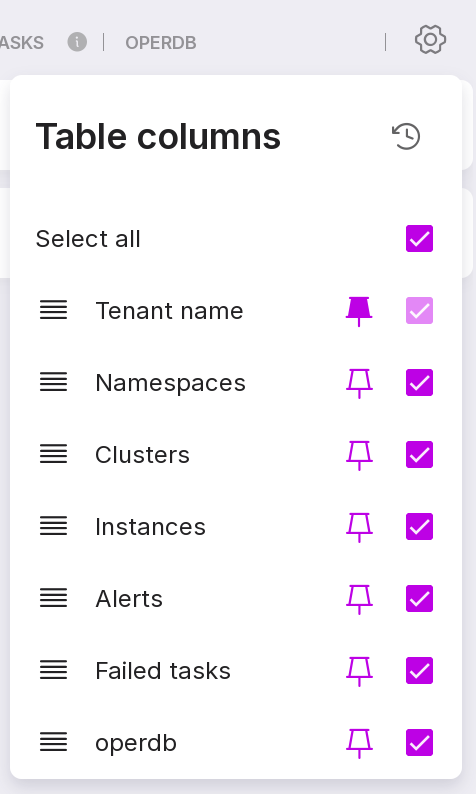
Table settings button, which allows you to pin, remove, or swap table columns.
Tenant menu containing the following options:
“Open Tenant” - Opens a page of namespaces inside the tenant. The “instances” tab of this page allows you to view all instances of tenant namespaces.
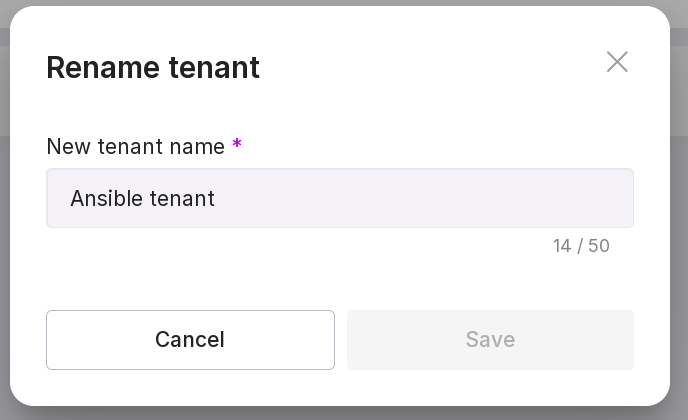
“Rename Tenant” - Opens a modal window for renaming the tenant. Type in new name of the tenant in the text field and click “Save”.
“Extended information” - opens a page with extended information on the tenant.
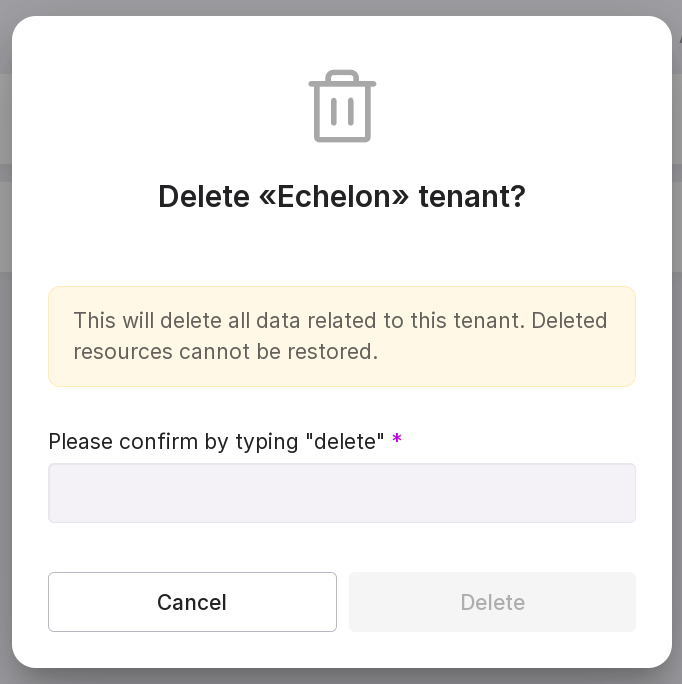
“Remove Tenant” - Opens a modal window to remove the tenant. Type “delete” in the text field and click “Delete”.
Note
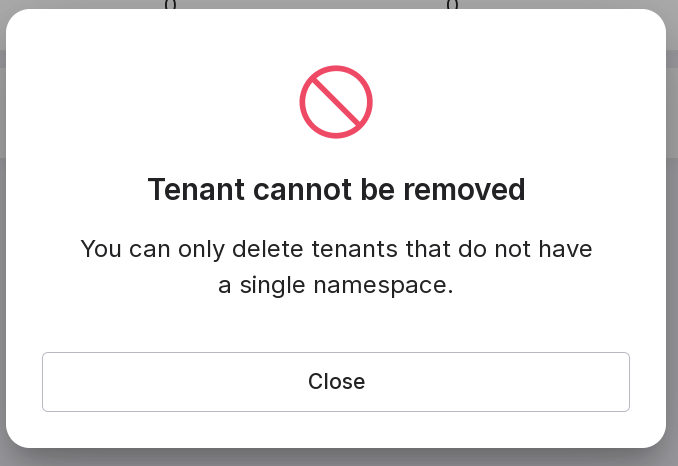
Delete all namespaces in the tenant before removing it. You cannot delete a tenant with namespaces:
Advanced Tenant Information Page
The Extended Information page allows you to manage user access rights to the tenant.
Let’s review the information on the page:
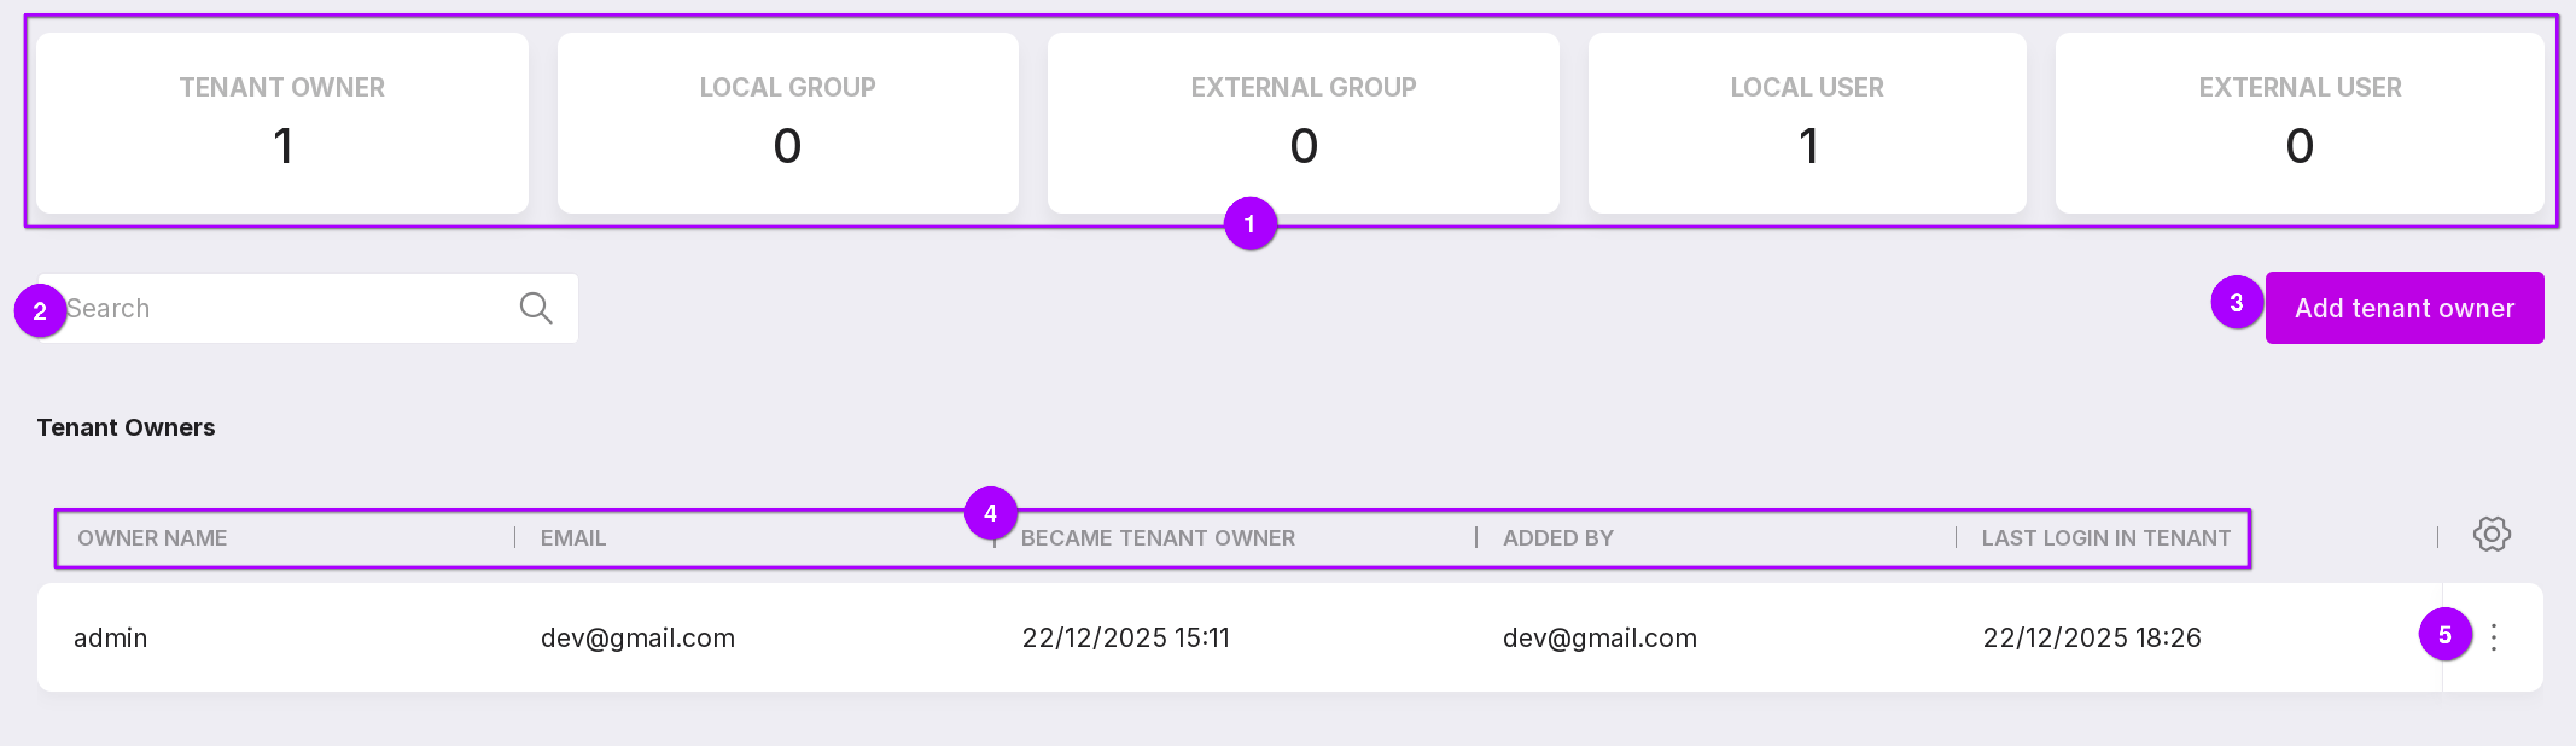
Additional information on the tenant:
Number of tenant owners;
Number of local groups created within the tenant;
Number of external groups synchronized with the tenant;
Number of local users of the tenant;
number of external users of the tenant.
Search bar to search for tenant owners by name or mail.
Add Tenant Owner button, which will bring up the Add Tenant Owner modal window.
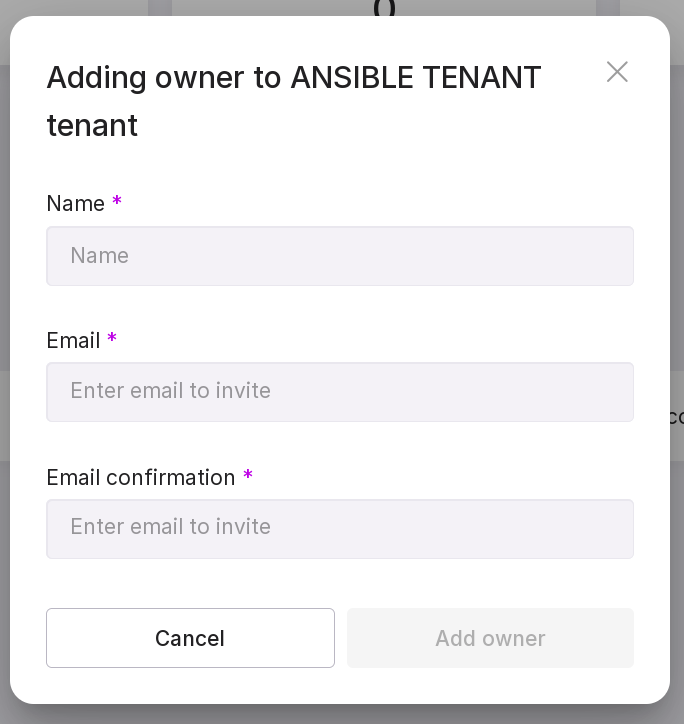
To add a new owner, do the following:
Fill in the username to which you want to give Tenant Owner rights.
Specify the user’s mail.
Please re-enter the mail.
Click “Add Tenant Owner”.
List of Tenant Owners and information on them:
the name of the Tenant Owner;
mail of the Tenant Owner;
date and time of issuance of Tenant Owner’s rights to the user;
mail of the user who issued the Owner’s rights to the tenant;
the date and time of the user’s last entry into the tenant.
The Owner menu has two options:
“Revoke rights” - Allows you to remove a user from the tenant’s ownership list. To do this, type “revoke” in the text box of the modal window that opens and click “revoke”.
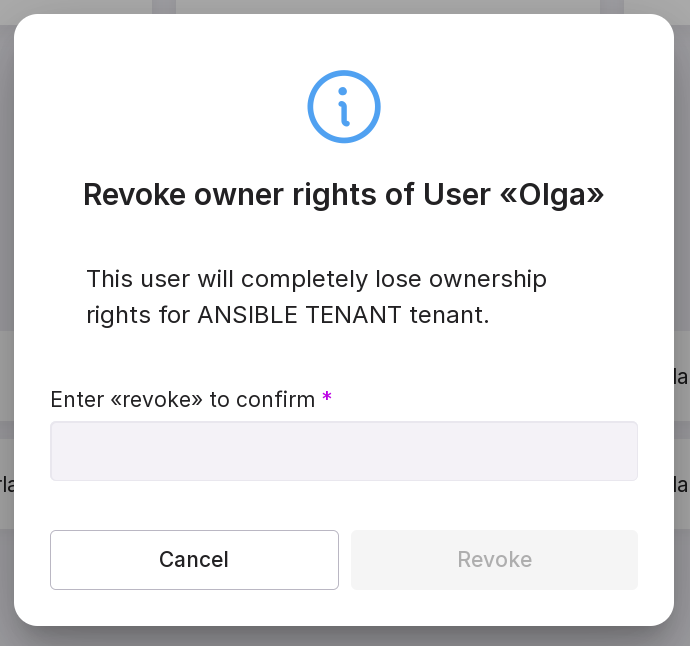
Note
If you revoke a user’s rights, the user will only be removed from the Tenant Owners list, but will remain the user. He will be able to enter the tenant, but will only see the namespaces he is given access to.
If you need to remove a user from the tenants, do the following:
select “Revoke rights” from the Owner menu;
go to list of users of tenant and deactivate user;
delete user.
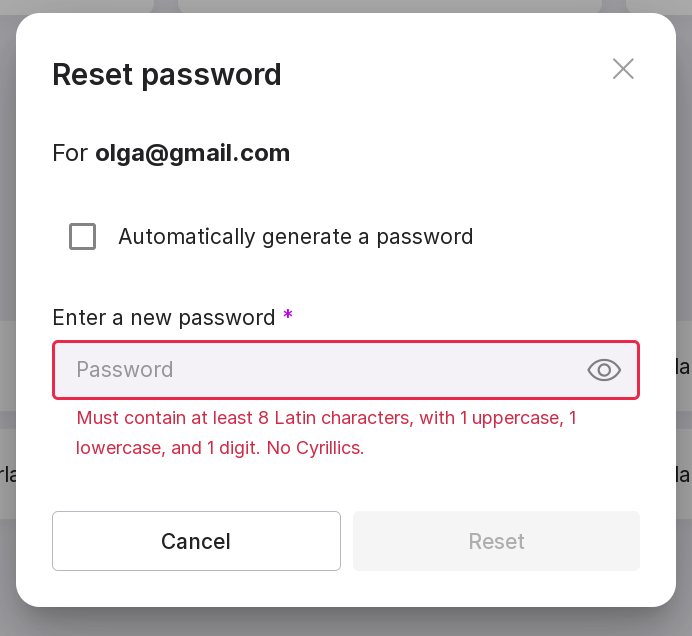
“Reset Password” - Allows you to reset the old Owner password and automatically or independently create a new one.
To automatically generate a password click “Reset”.
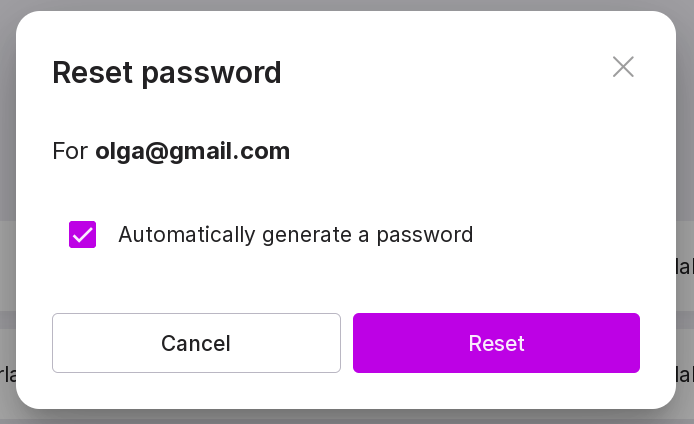
To create a new password manually uncheck the “Automatically generate a password” check box, enter the new password and click “Reset”.