External authentication
This page describes how to use the integration features of Platform with Active Directory/FreeIPA/ALD pro servers in a single LDAP profile.
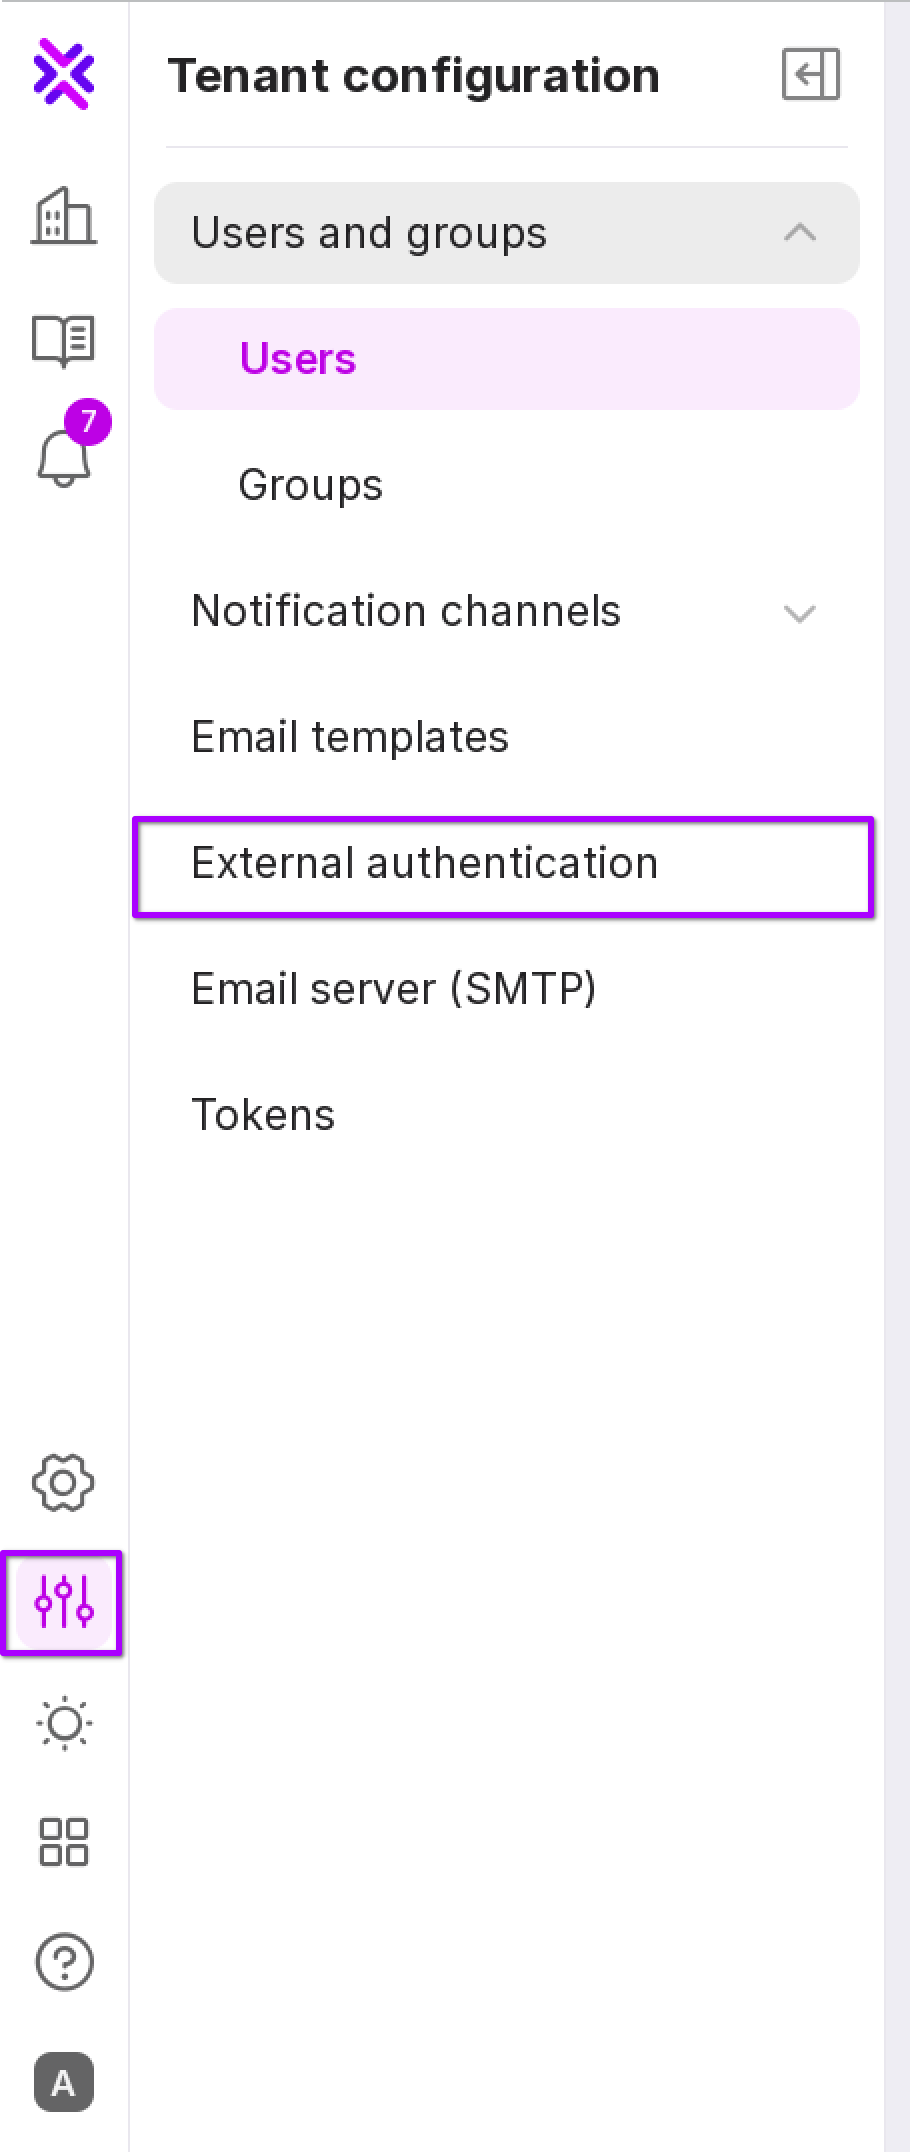
To use the LDAP functionality, click ‘Tenant configuration’ in the left panel → ‘External Authentication’.
The LDAP tab of the ‘External Authentication’ page will open:
Connecting to LDAP and configuring the profile
Attention
The client company is responsible for the secure configuration of the LDAP settings and the secure connection setup.
Below are the options for connecting to the following directory services:
Active Directory (AD)
To connect to LDAP and configure the profile, follow these steps:
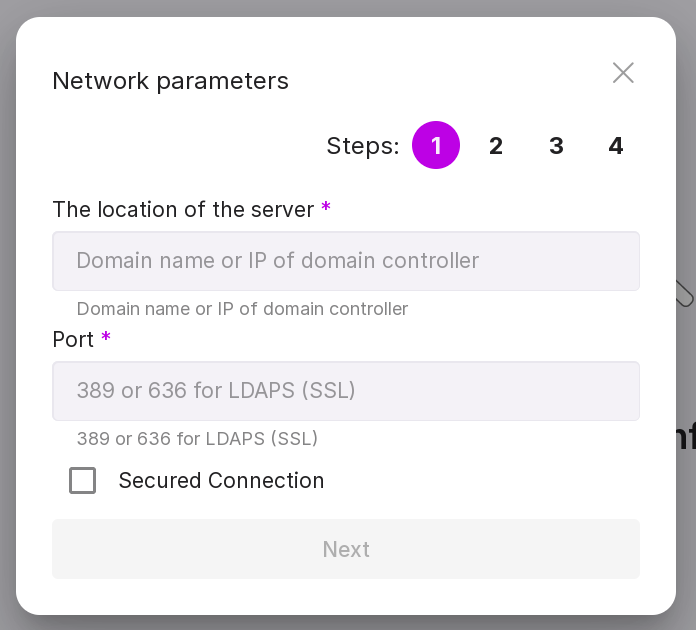
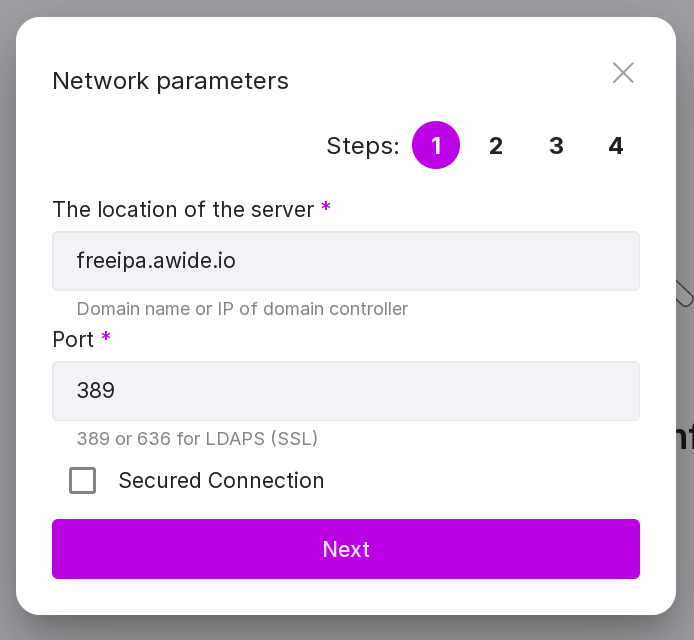
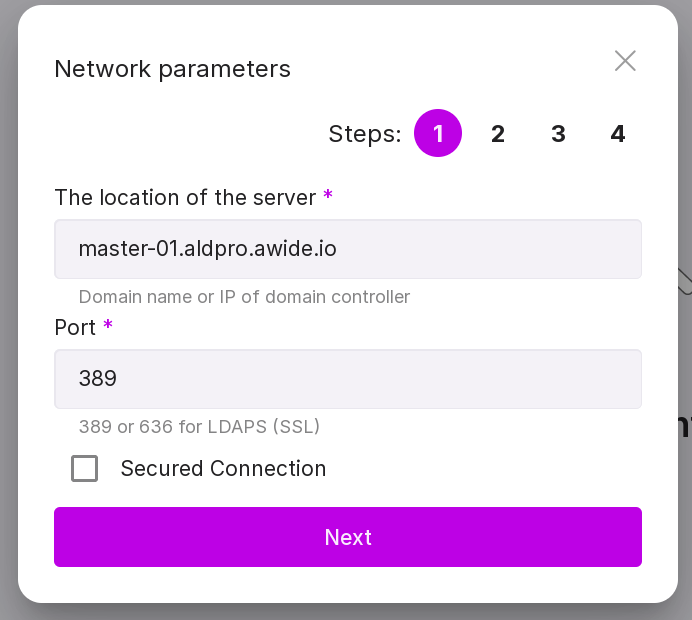
Step 1:
Specify the domain name or IP address of the domain controller, for example, ‘10.128.0.189’.
Specify the port - 389 for an unsecured connection or 636 for a secured one.
If necessary, check the ‘Secured connection’ checkbox.
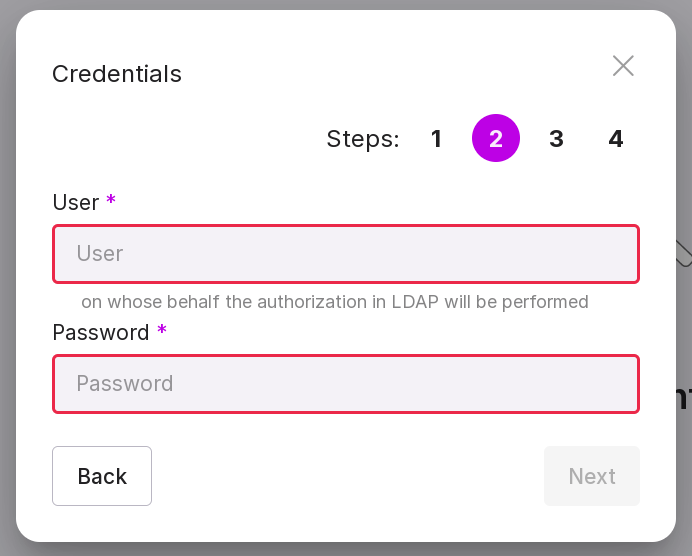
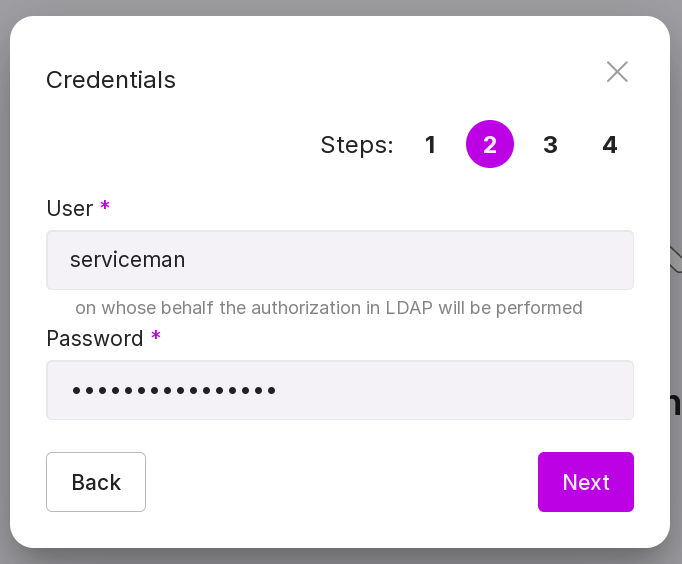
Step 2:
Specify the email address of the user which Platform will use to authenticate in LDAP, for example, ‘serviceman@ad.awide.io’.
Type inpassword of the user which Platform will use to authenticate in LDAP.
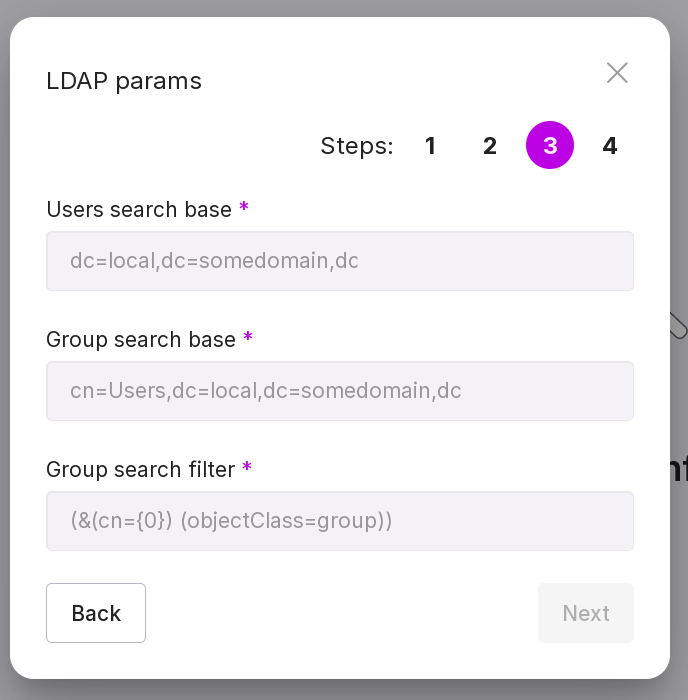
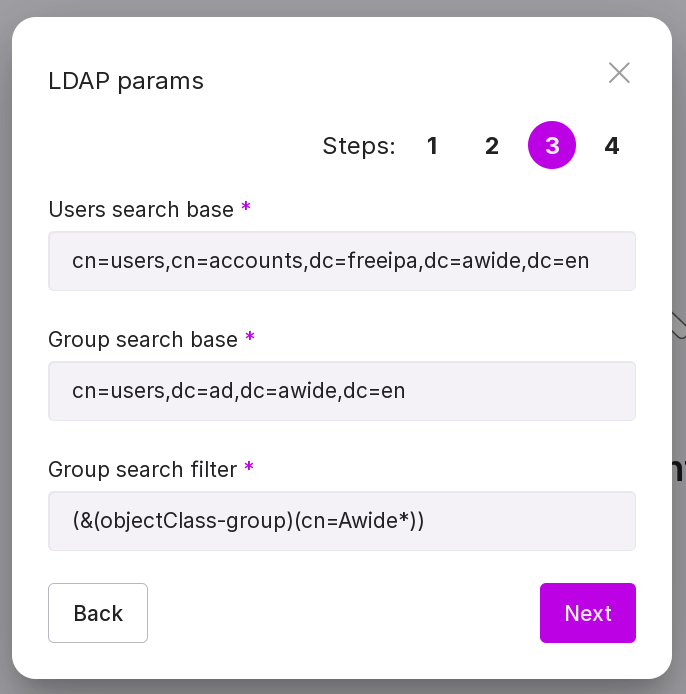
Step 3:
Configure the conditions for searching users and groups in LDAP:
path to users, for example, ‘cn=Users, dc=company,dc=com’;
path to groups, for example, ‘cn=Users, dc=ad, dc=awide, dc=en’;
search filter for groups, for example, ‘(&(objectClass=group)(cn=Awide*))’.
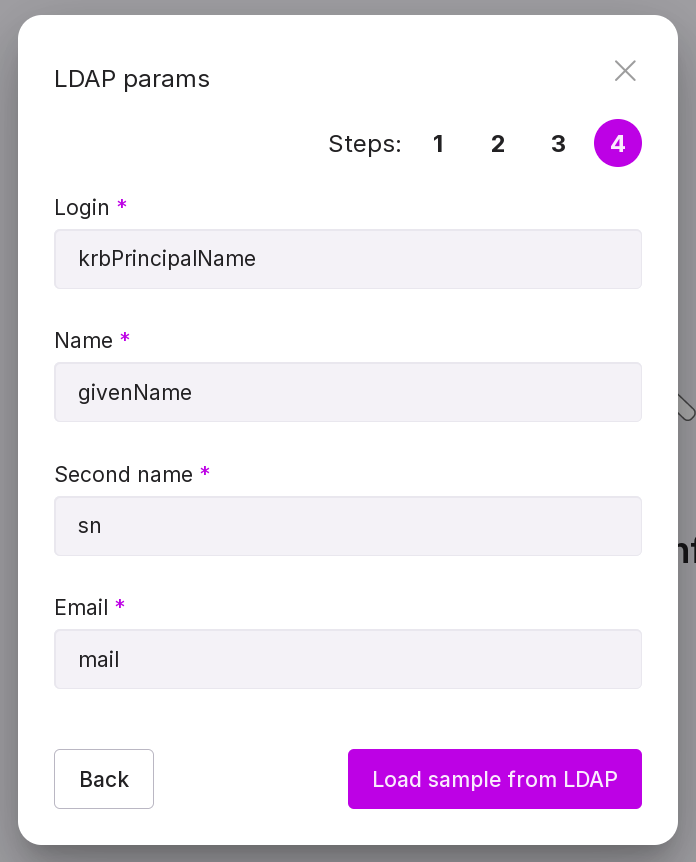
Step 4:
Configure the mapping of LDAP user attributes to Awide:
‘Login’ parameter of the LDAP user, for example, ‘userPrincipalName’;
‘First Name’ parameter of the LDAP user, for example, ‘givenName’;
the parameter “Surname” of the LDAP user, for example, “sn”;
the parameter “Email” of the LDAP user, for example, “mail”.

Important
The user will not be added if an empty/unfilled LDAP attribute is specified as the login.
After entering all parameters, a connection with the target server is checked. The timeout for establishing a connection is 10 seconds. If the connection is successful, “Confirm and complete integration” button is activated.
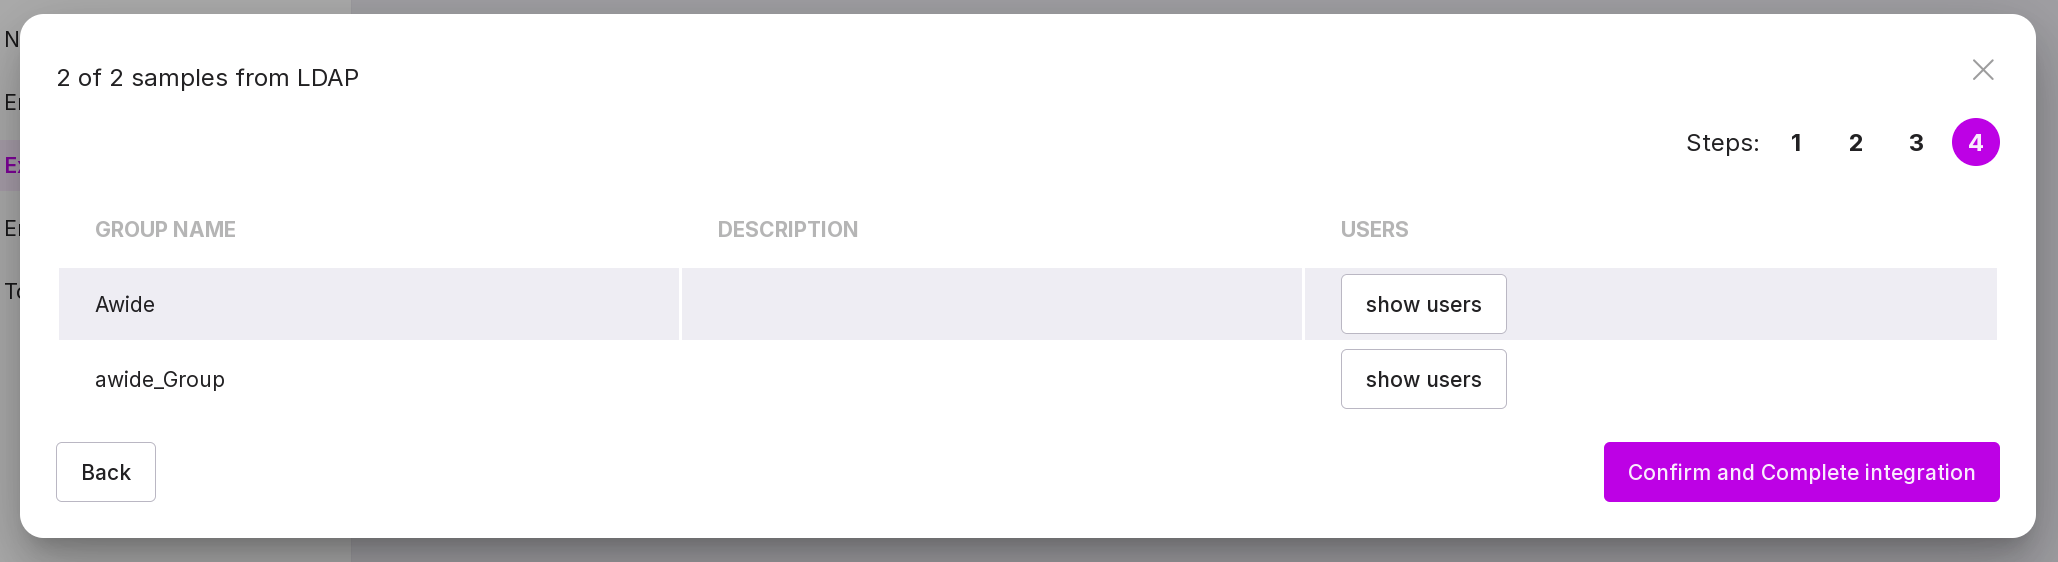
After pressing this button, the users will be uploaded.
With successful integration with LDAP, additional users from AD/FreeIPA/ALD pro, unrelated to internal users and groups, will appear in the group list and user list.
FreeIPA
To connect to LDAP and configure the profile, complete the following steps:
Step 1:
Specify the domain name or IP address of the domain controller, for example, “freeipa.awide.io”.
Specify the port - 389 for an unsecured connection or 636 for a secured one.
If necessary, check the ‘Secured connection’ checkbox.
Step 2:
Specify the username under which Platform will authenticate in LDAP.
Type in password of the user under which Platform will authenticate in LDAP.
Step 3:
Configure the conditions for searching users and groups in LDAP:
the path to users, for example, “cn=users,cn=accounts,dc=freeipa,dc=awide,dc=en”;
the path to groups, for example, “cn=groups,cn=accounts,dc=freeipa,dc=awide,dc=en”;
search filter for groups, for example, “”(cn=*)”.”
Step 4:
Configure the mapping of user attributes in LDAP to Awide:
the parameter “Login” of the LDAP user, for example, “krbPrincipalName”;
‘First Name’ parameter of the LDAP user, for example, ‘givenName’;
the parameter “Surname” of the LDAP user, for example, “sn”;
the parameter “Email” of the LDAP user, for example, “mail”.
Important
The user will not be added if an empty/unfilled LDAP attribute is specified as the login.
After entering all parameters, a connection check with the target server is performed. The timeout for establishing a connection is 10 seconds. If the connection is successful, the button “Confirm and complete integration” is activated.
After pressing this button, the user upload will begin.
With successful integration with LDAP, additional users from AD/FreeIPA/ALD pro, unrelated to internal users and groups, will appear in the group list and user list.
ALD Pro
To connect to LDAP and configure the profile, follow these steps:
Step 1:
Specify the domain name or IP address of the domain controller, for example, “master-01.aldpro.awide.io”.
Specify the port - 389 for an unsecured connection or 636 for a secured one.
If necessary, check the ‘Secured connection’ checkbox.
Step 2:
Specify the username under which Platform will authenticate in LDAP.
Type in password of the user under which Platform will authenticate in LDAP.
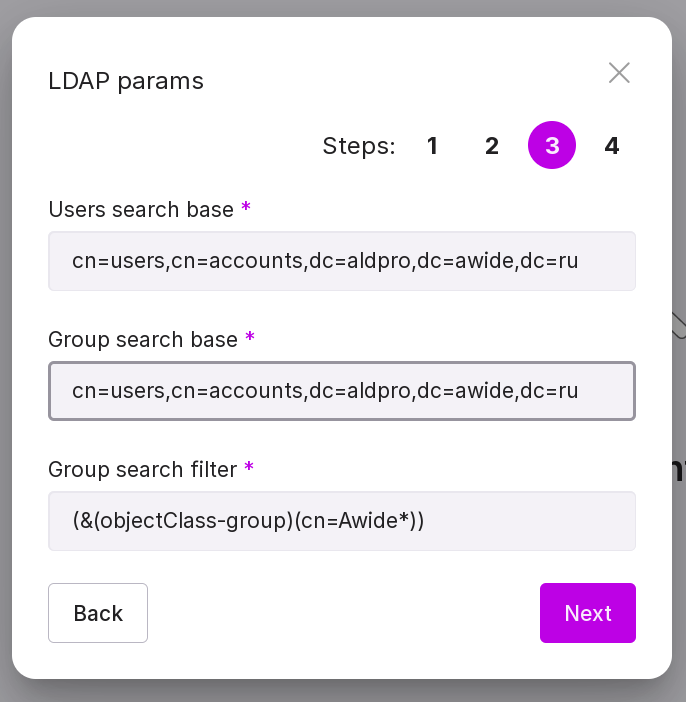
Step 3:
Configure the conditions for searching users and groups in LDAP:
the path to users, for example, “cn=users,cn=accounts,dc=aldpro,dc=awide,dc=en”;
the path to groups, for example, “cn=groups,cn=accounts,dc=aldpro,dc=awide,dc=en”;
search filter by groups, for example, “(cn=*)”.
Step 4:
Configure the mapping of user attributes in LDAP to Awide:
the parameter “Login” of the LDAP user, for example, “krbPrincipalName”;
the parameter “First Name” of the LDAP user, for example, “givenName”;
the parameter “Last Name” of the LDAP user, for example, “sn”;
the parameter “Email” of the LDAP user, for example, “mail”.
Important
The user will not be added if an empty/unfilled LDAP attribute is specified as the login.
After entering all parameters, a connection check with the target server is performed. Connection timeout - 10 seconds. If the connection is successful, the button “Confirm and complete integration” is activated.
After pressing this button, the user upload will begin.
With successful integration with LDAP, additional users from AD/FreeIPA/ALD pro, unrelated to internal users and groups, will appear in the group list and user list.
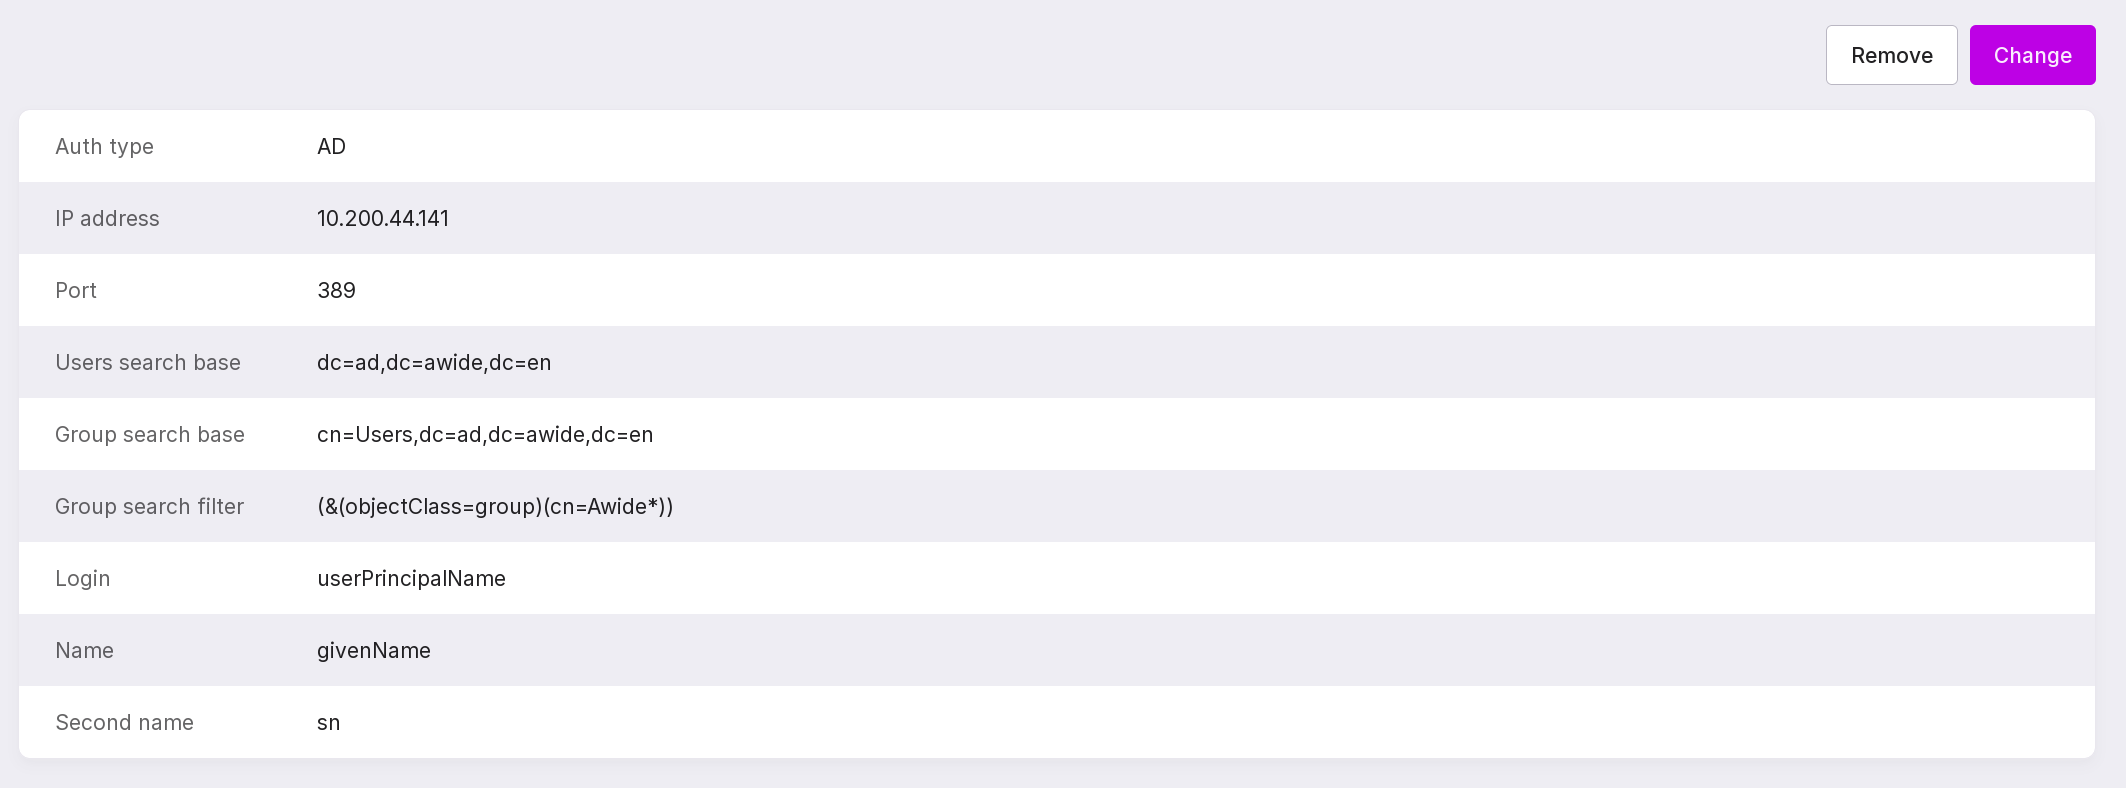
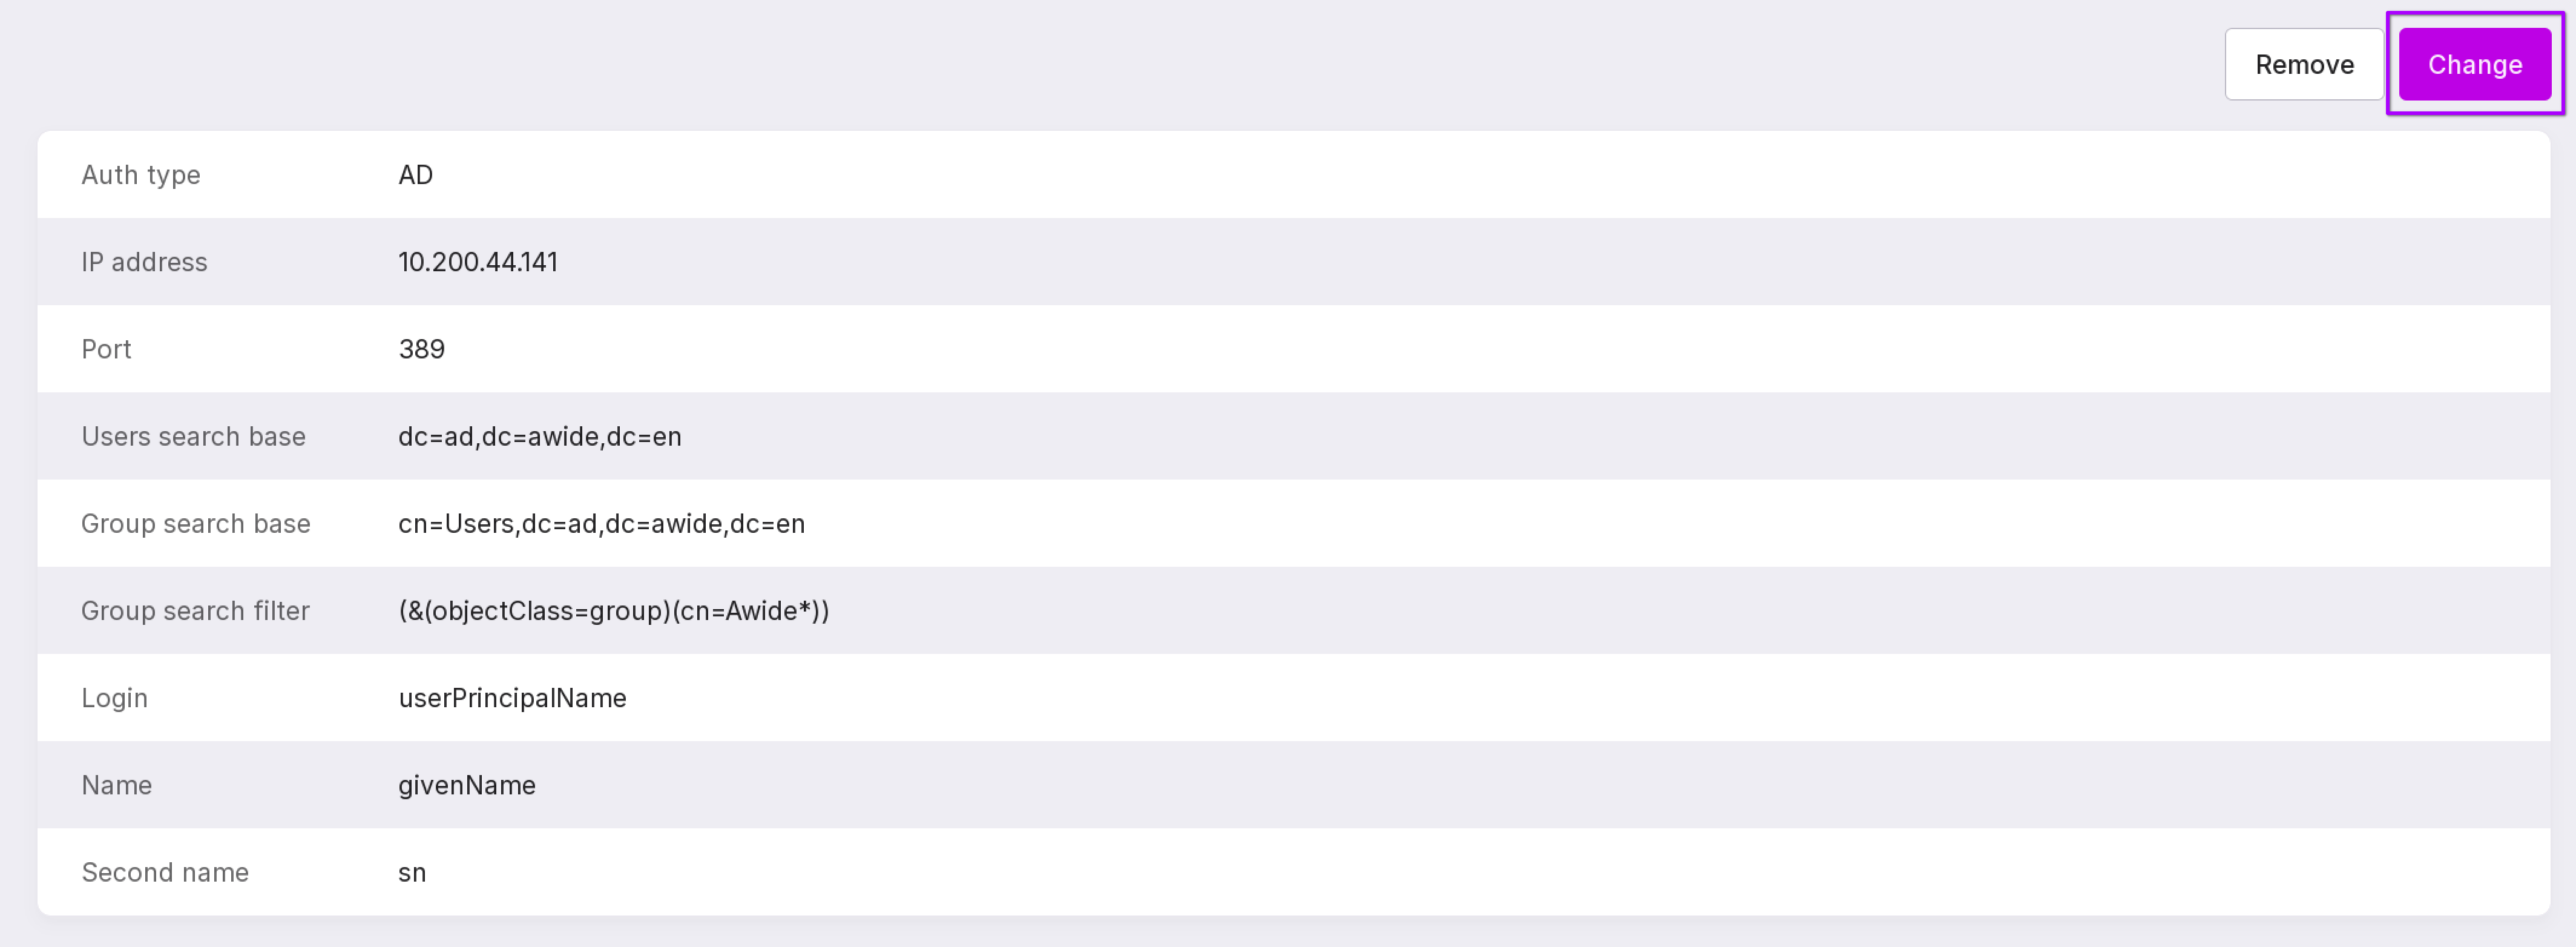
Change connection or profile settings
To change the connection or other profile parameters, click “Change” in the upper right corner.
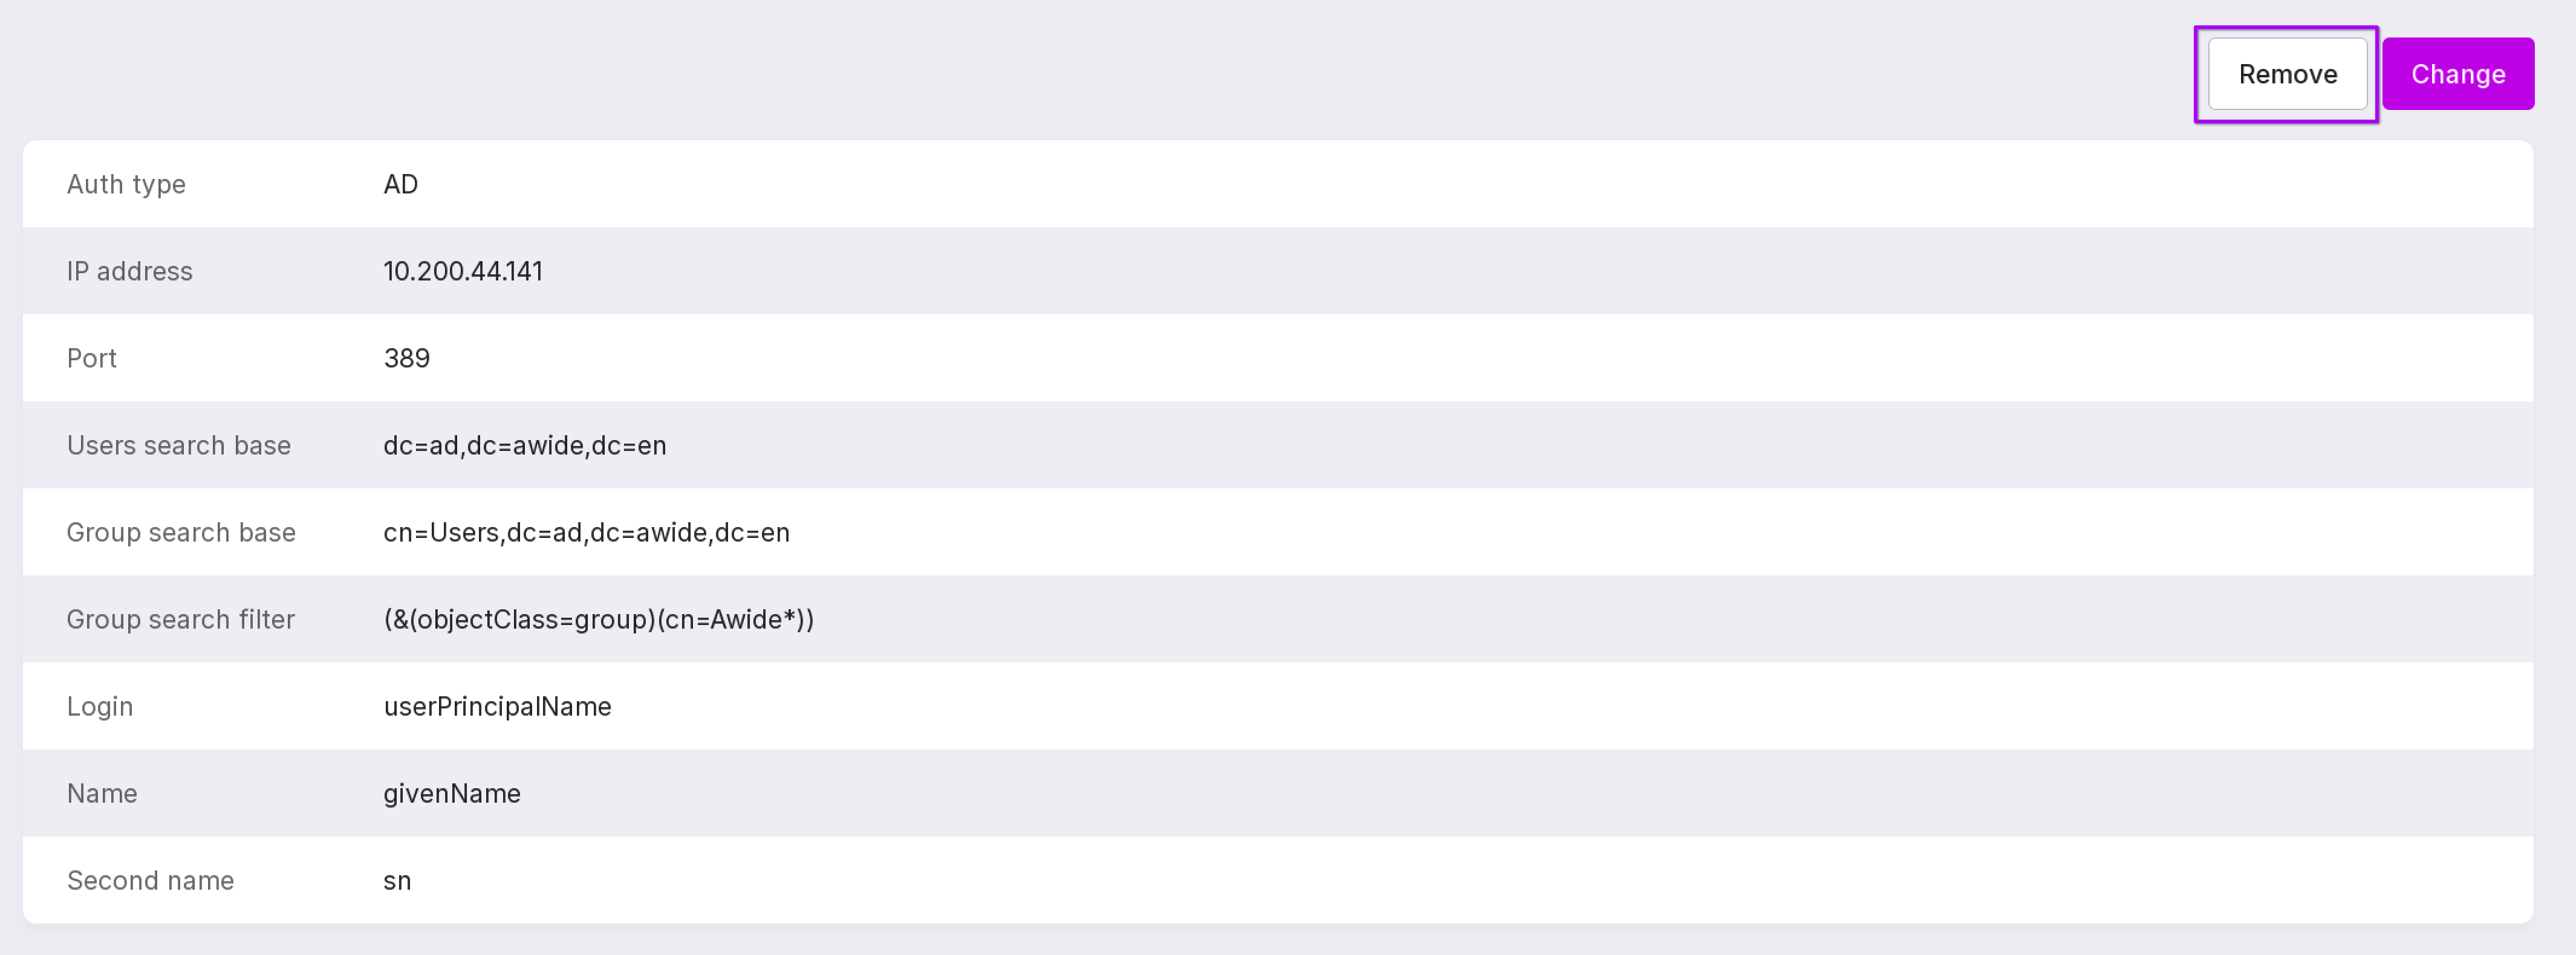
Removing LDAP integration
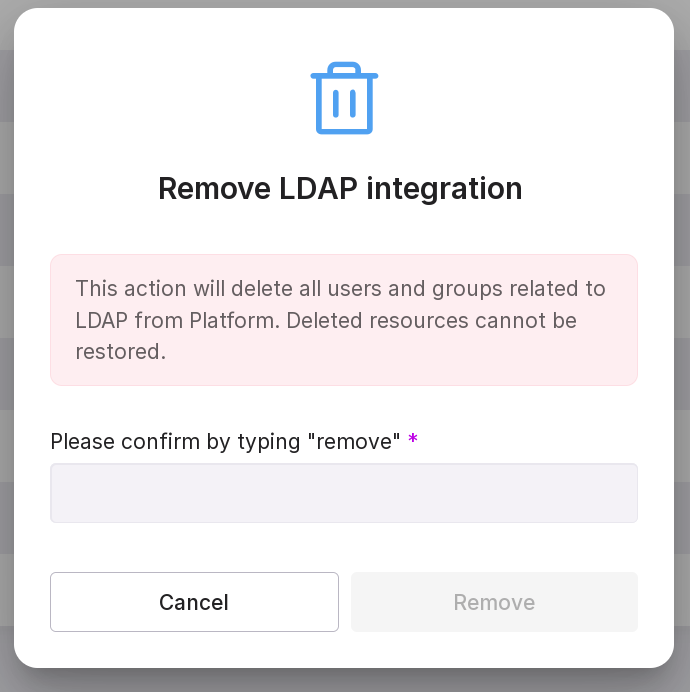
To remove the LDAP integration, click “Remove” in the upper right corner.
In the text field, type “remove” and click “Remove”.
LDAP user groups
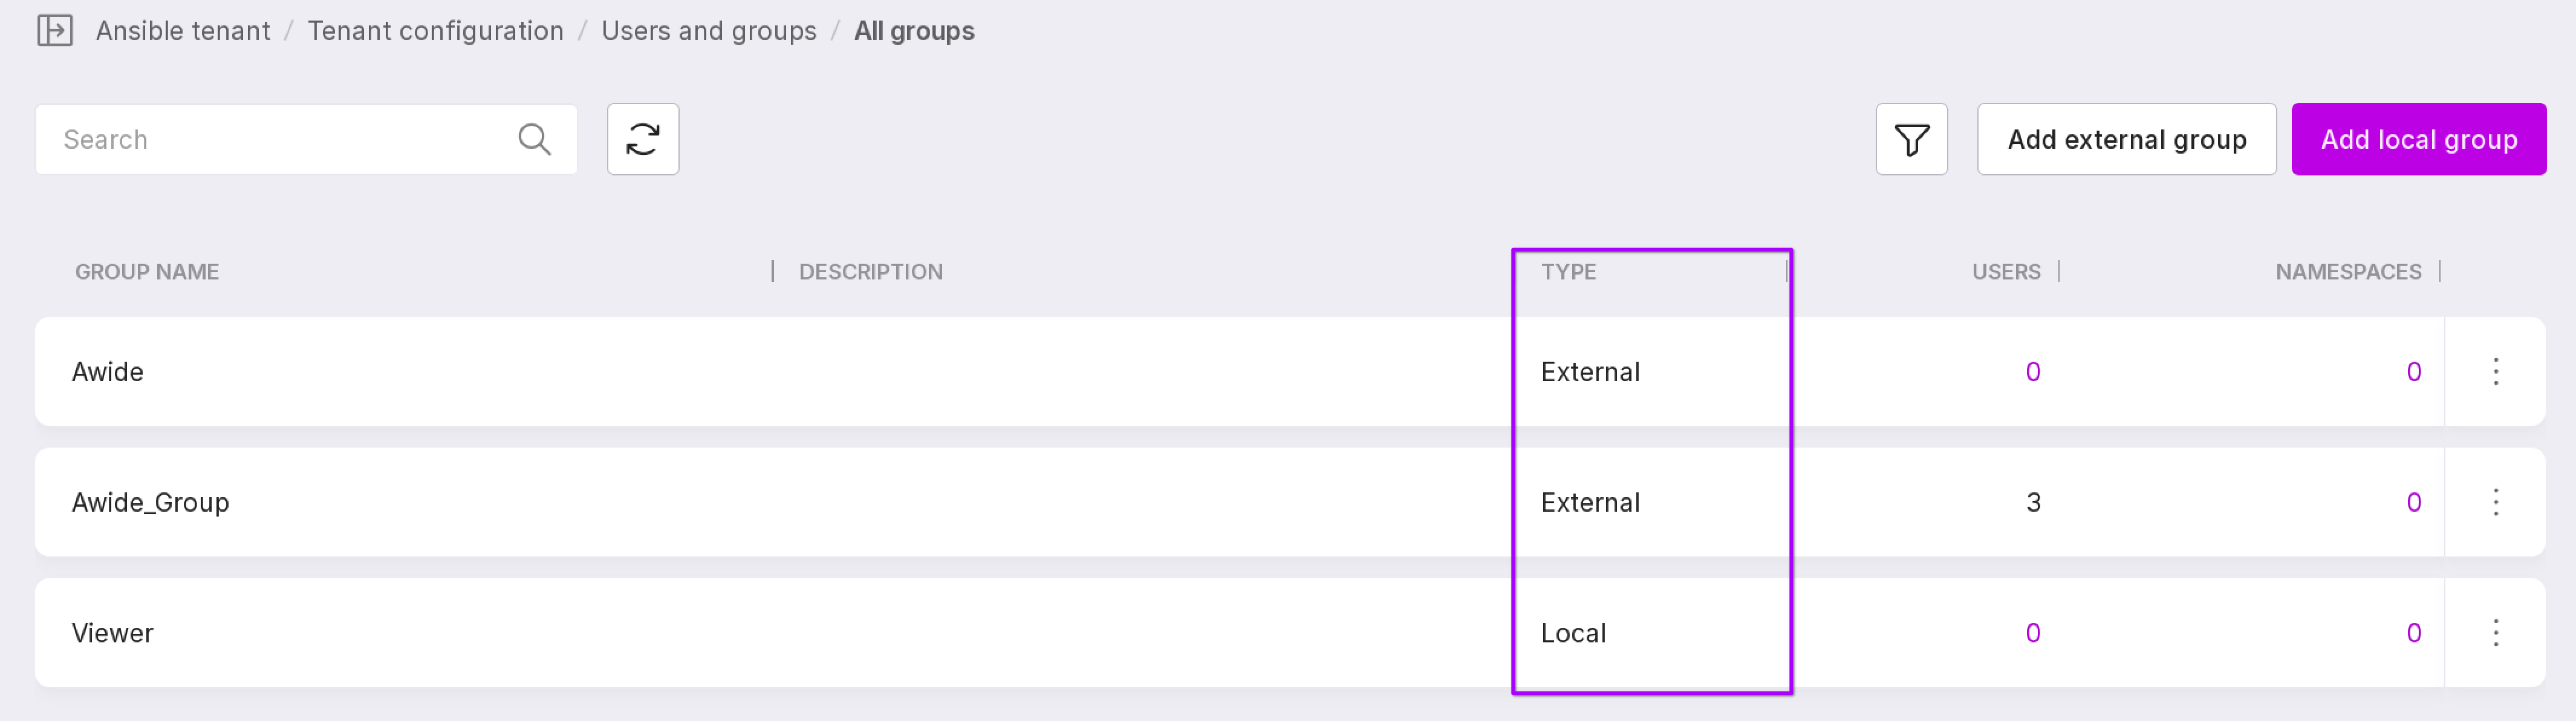
To open the user groups page, in the left panel click “Tenant configuration” → “Users and Groups” → “Groups”.
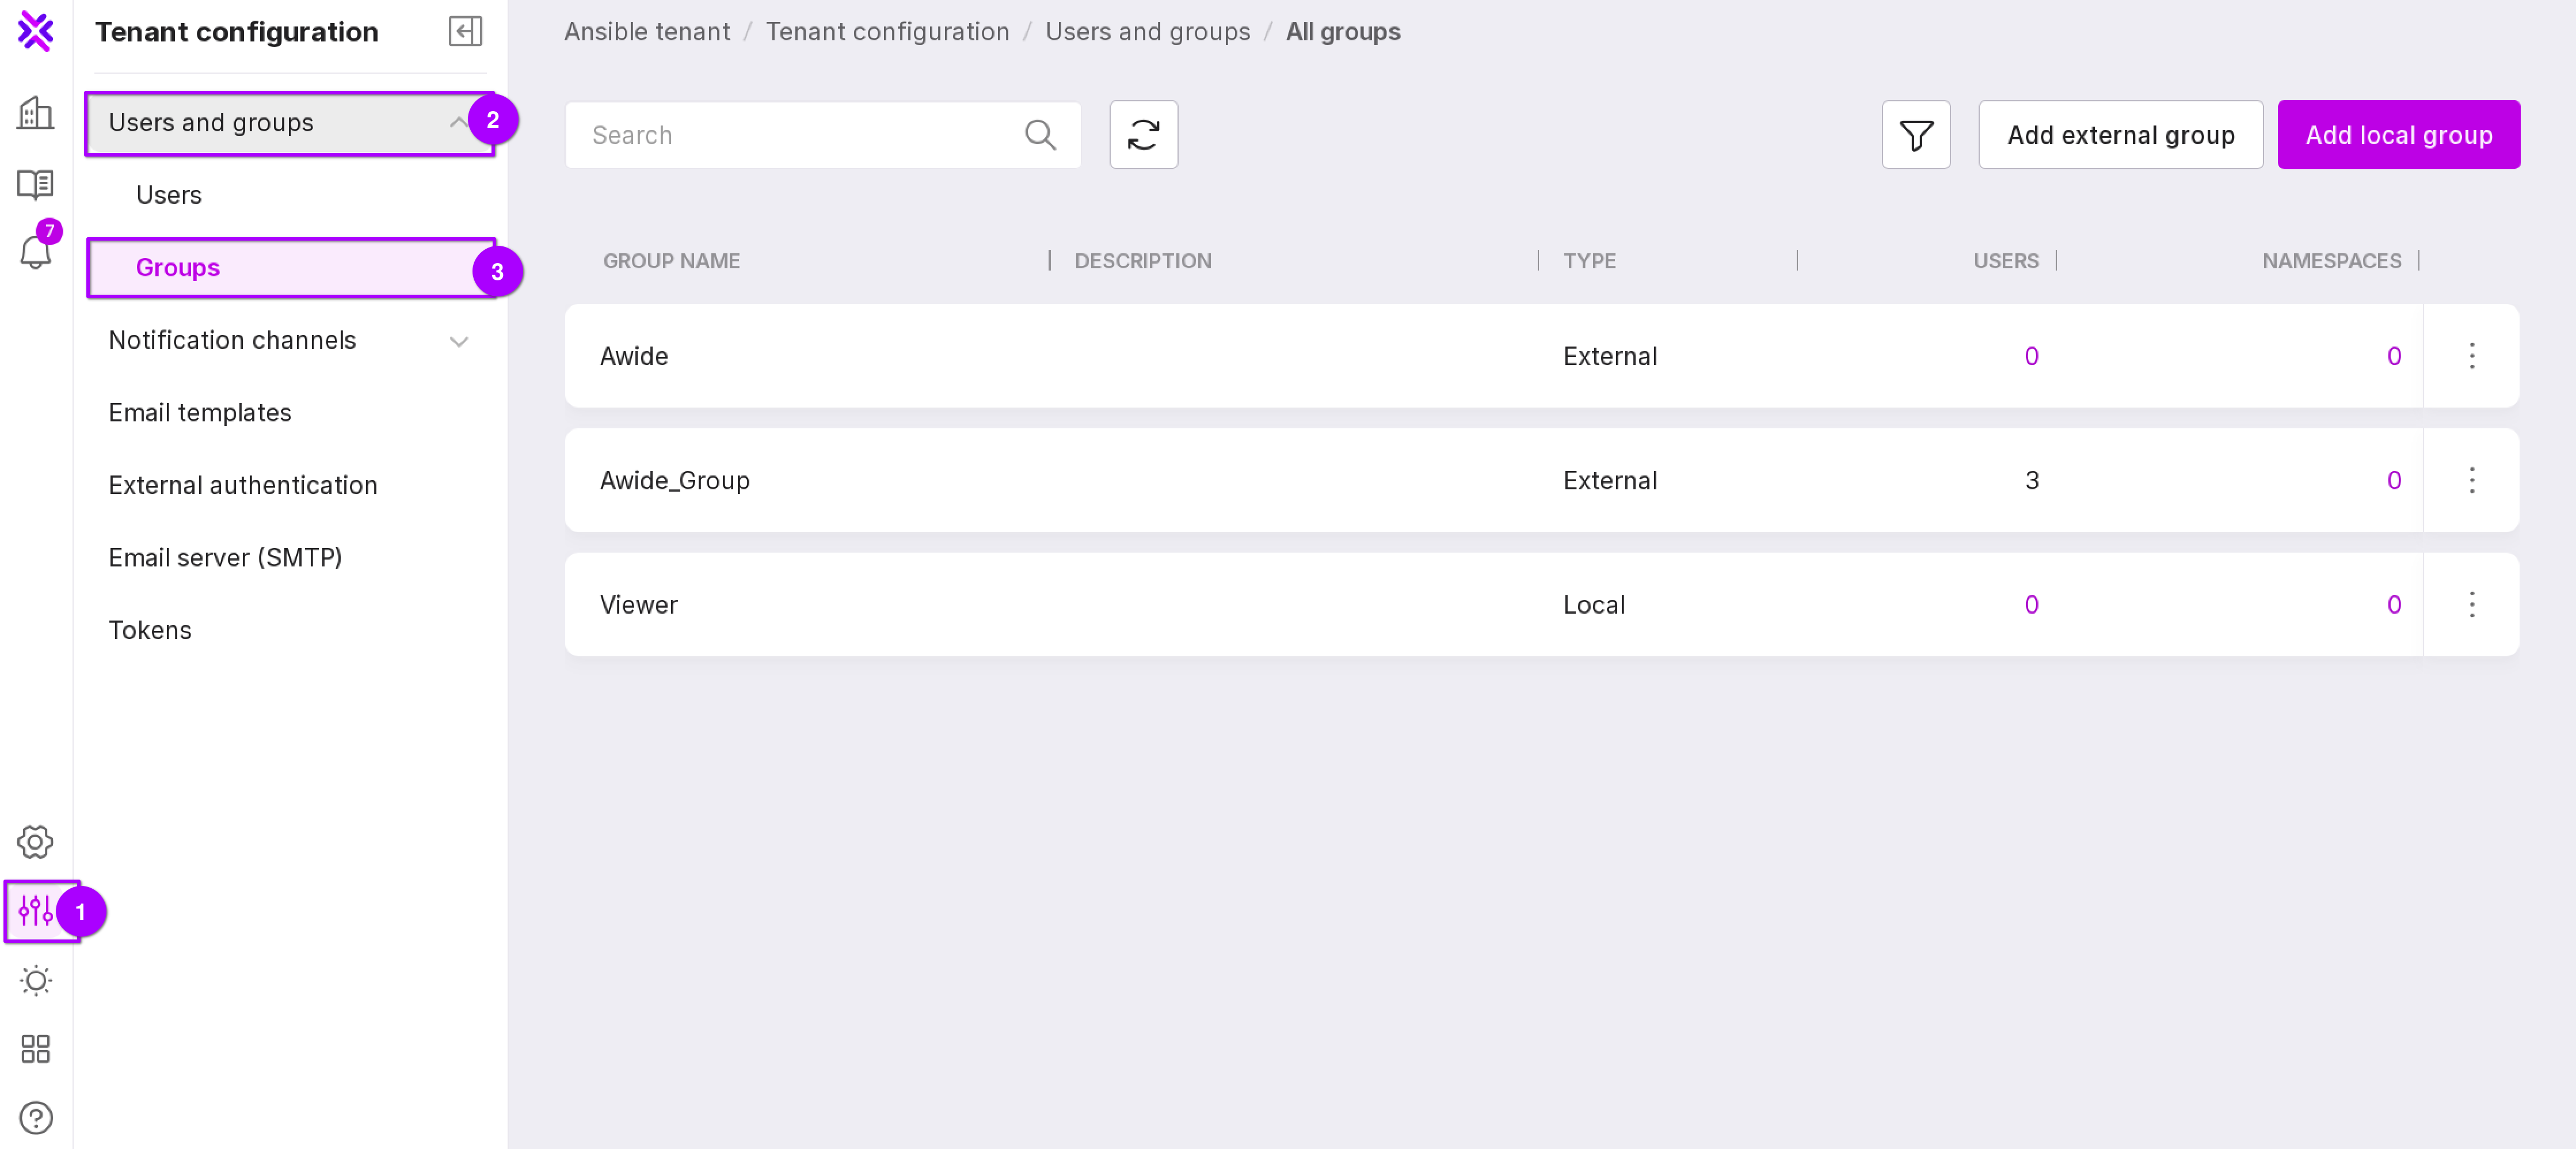
On the user groups page, the column “Group Type” shows which group the users of the identity directories are added to — the group type is “External”, and which local users — the group type is “Local”.
Click on the group and go to the “Users” tab to open the list of group users.
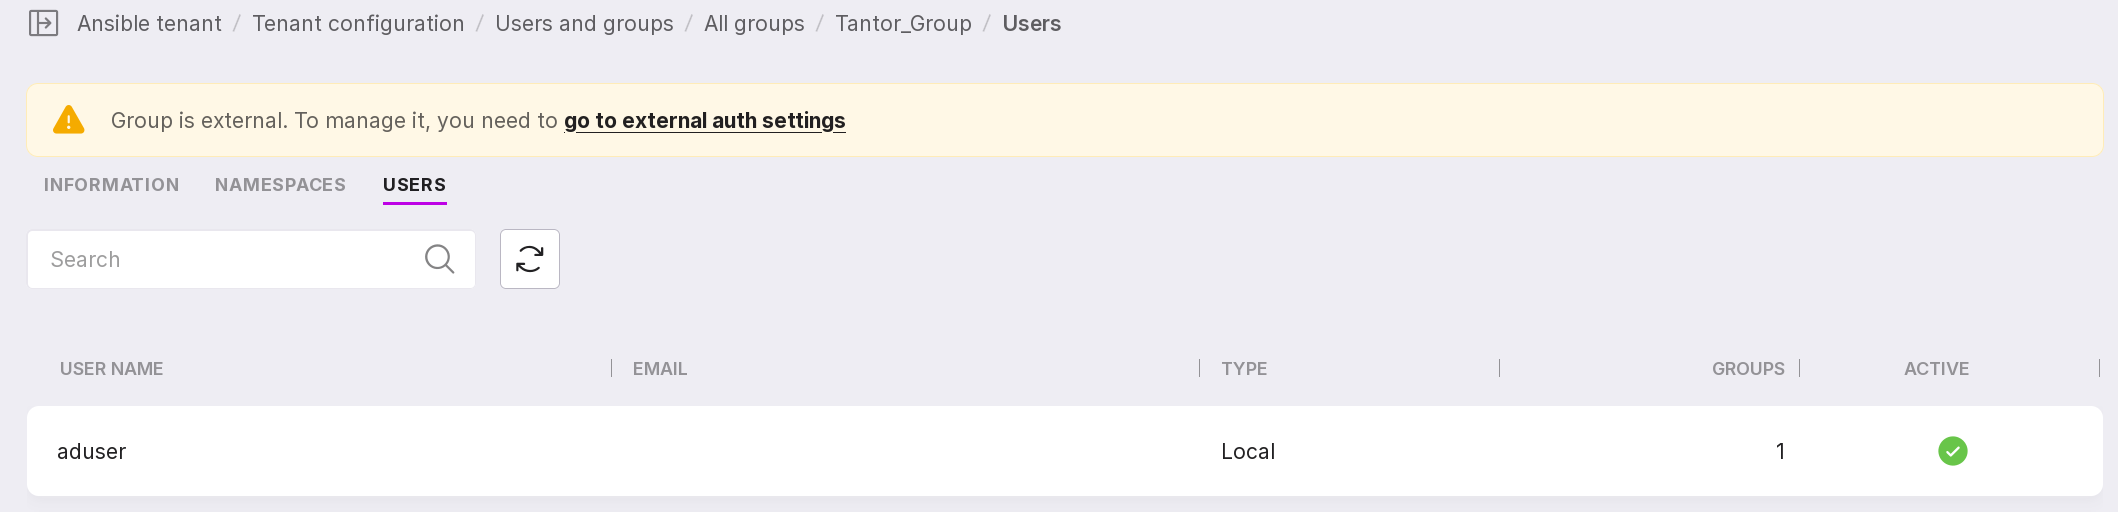
Attention
On the “Groups” page, you cannot edit the name and description of LDAP groups. The buttons for adding and removing LDAP groups on this page open the LDAP profile.