The “Actions” page
To open the “Actions” page, click on any task on the “Tasks” page.
Each line on the page represents one of the actions, the sequential execution of which will lead to the completion of the task.
Let’s review this page:
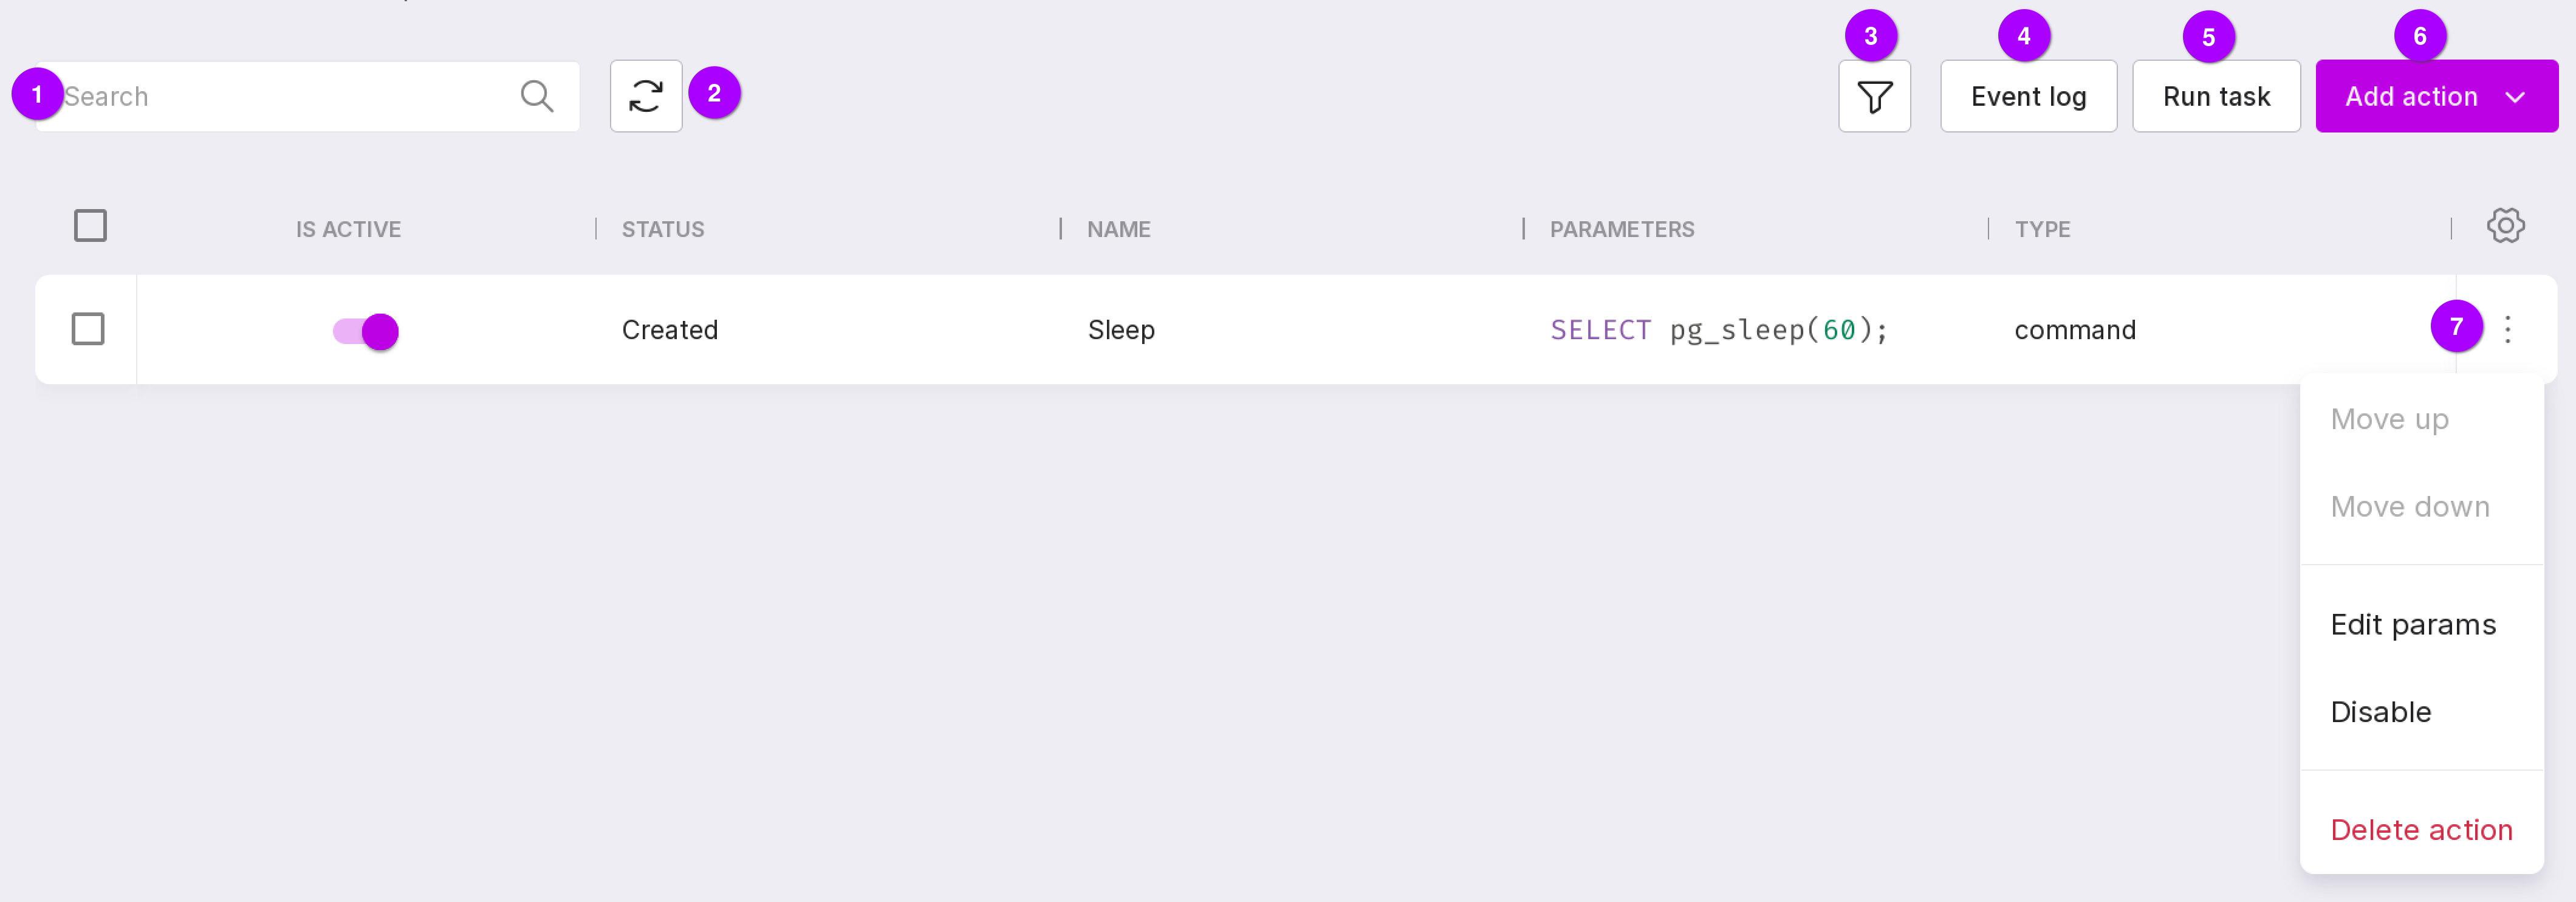
“Search” — you can find an action by its name using the search bar.
“Refresh” — refreshes the page.
“Filter”.
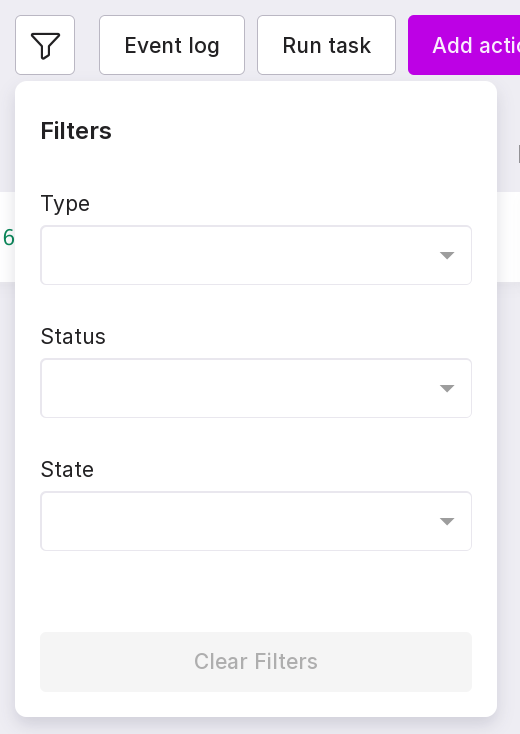
Includes 3 filters:
“Type” — filter for searching actions by type: system command or SQL query.
“State” — filter for searching actions by state:
“Created” — actions that have been created but not yet executed;
“Error” — actions that were executed with an error;
“In progress” — actions that are currently being executed;
“Success” — actions that were successfully executed;
“Aborted” — actions that were forcibly aborted during execution;
“Timeout” — actions that have timed out.
“State” — filter for searching actions by state:
“Disabled” — actions that cannot be executed when the task is started;
“Enabled” — actions that can be executed when the task is started.
“Clear filters” button, number 4 in the figure above, clears all filters.
“Event Log” — allows you to go to the Event Log page of the selected task.
“Run Task” — starts the current task.
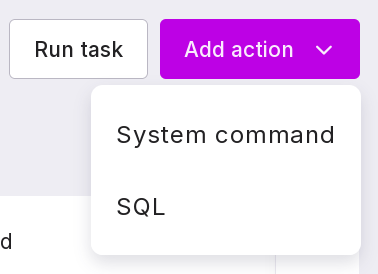
“Add Action” — allows you to add a new action.
To add a new action:
Select the type of action from the dropdown list:
“System Command” — commands for managing databases;
“SQL” — queries in SQL language;
Fill in the fields in the pop-up modal window. Depending on the type of action, the windows you see will differ:
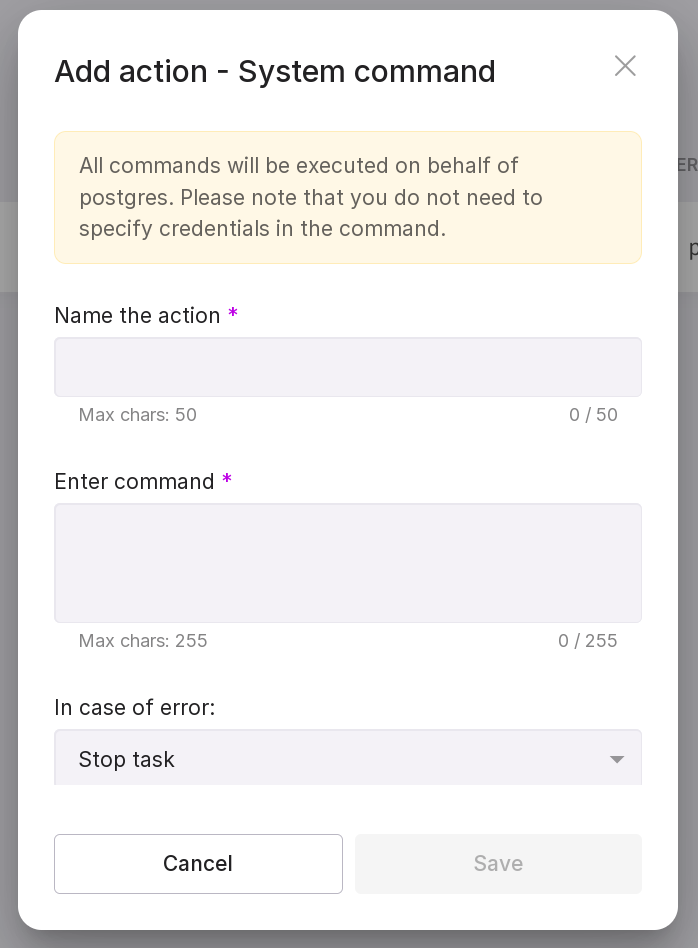
System Command:
“Name the action” — type in a name for the action. Maximum length — 50 characters;
“Enter Command” — enter the system command that you want to execute as part of the action;
“In case of error” — select the required error-handling behavior from the dropdown list in case an error occurs during action execution:
“Stop Task” — the action will stop and the task will acquire “Error” state;
“Ignore error and continue task” — the error is ignored, and the action is not interrupted. If there are no restrictions, the task is completed with “Successful” state.
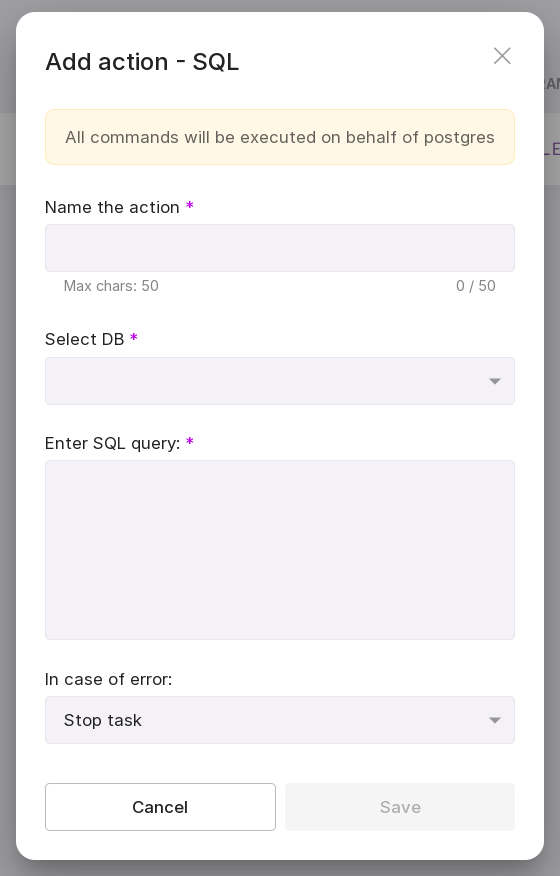
SQL Query:
“Name the action” — type in a name for the action. Maximum length — 50 characters;
“Select DB” — select the database for which the query will be executed;
“Enter SQL Query” — enter the text of the SQL query to be executed;
“In case of error” — select the required error-handling behavior from the dropdown list in case an error occurs during action execution:
“Stop Task” — the action will stop and the task will acquire “Error” state;
“Ignore error and continue task” — the error is ignored, and the action is not interrupted. If there are no restrictions, the task is completed with “Successful” state.
Click “Save”. A new action will appear in the list.
The action menu contains the following options:
“Move up” — moves the action one line up;
“Move down” — moves the action one line down;
“Edit params” — opens the editing window for the action parameters specified during its creation;
“Disable” — disables the action and makes it unavailable for execution when the task is run;
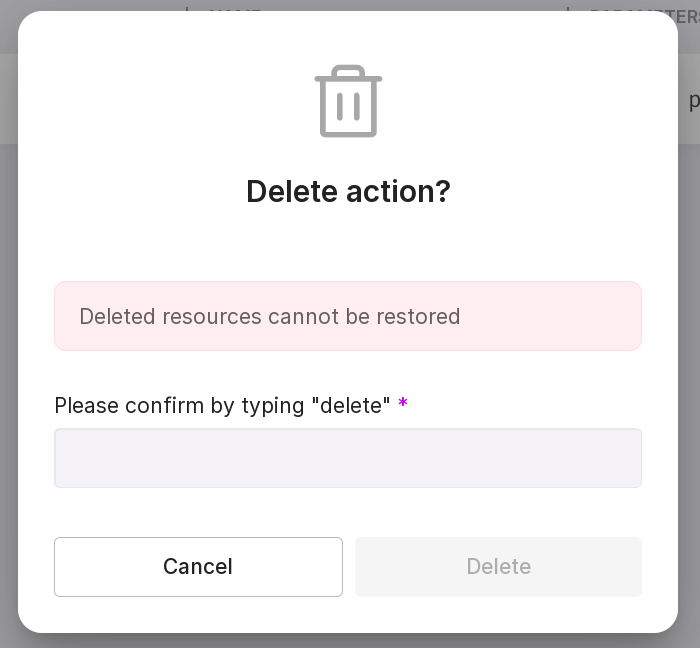
“Delete action” — opens the action deletion window. In the text field of the window, type in “delete” and click “Delete” to confirm.
The modal window for adding an action shows under which user the action will be executed. If you did not specify the username and password for the console or SQL when creating the task, you will see this message:
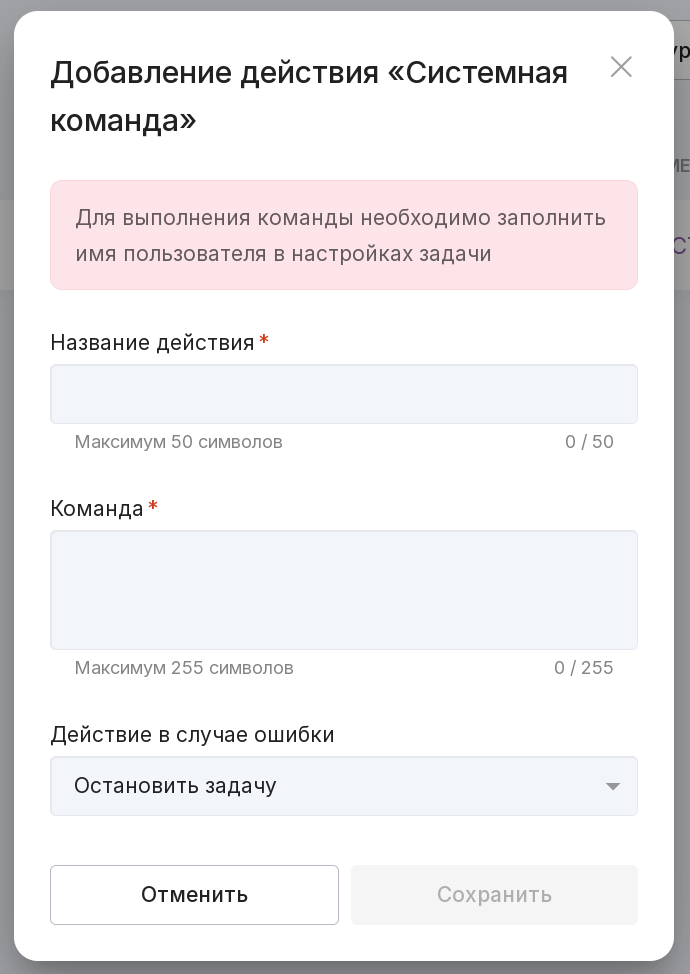
To add user data, return to the “Tasks” page, select “Edit params” in the menu of the required task, and specify the username and password.
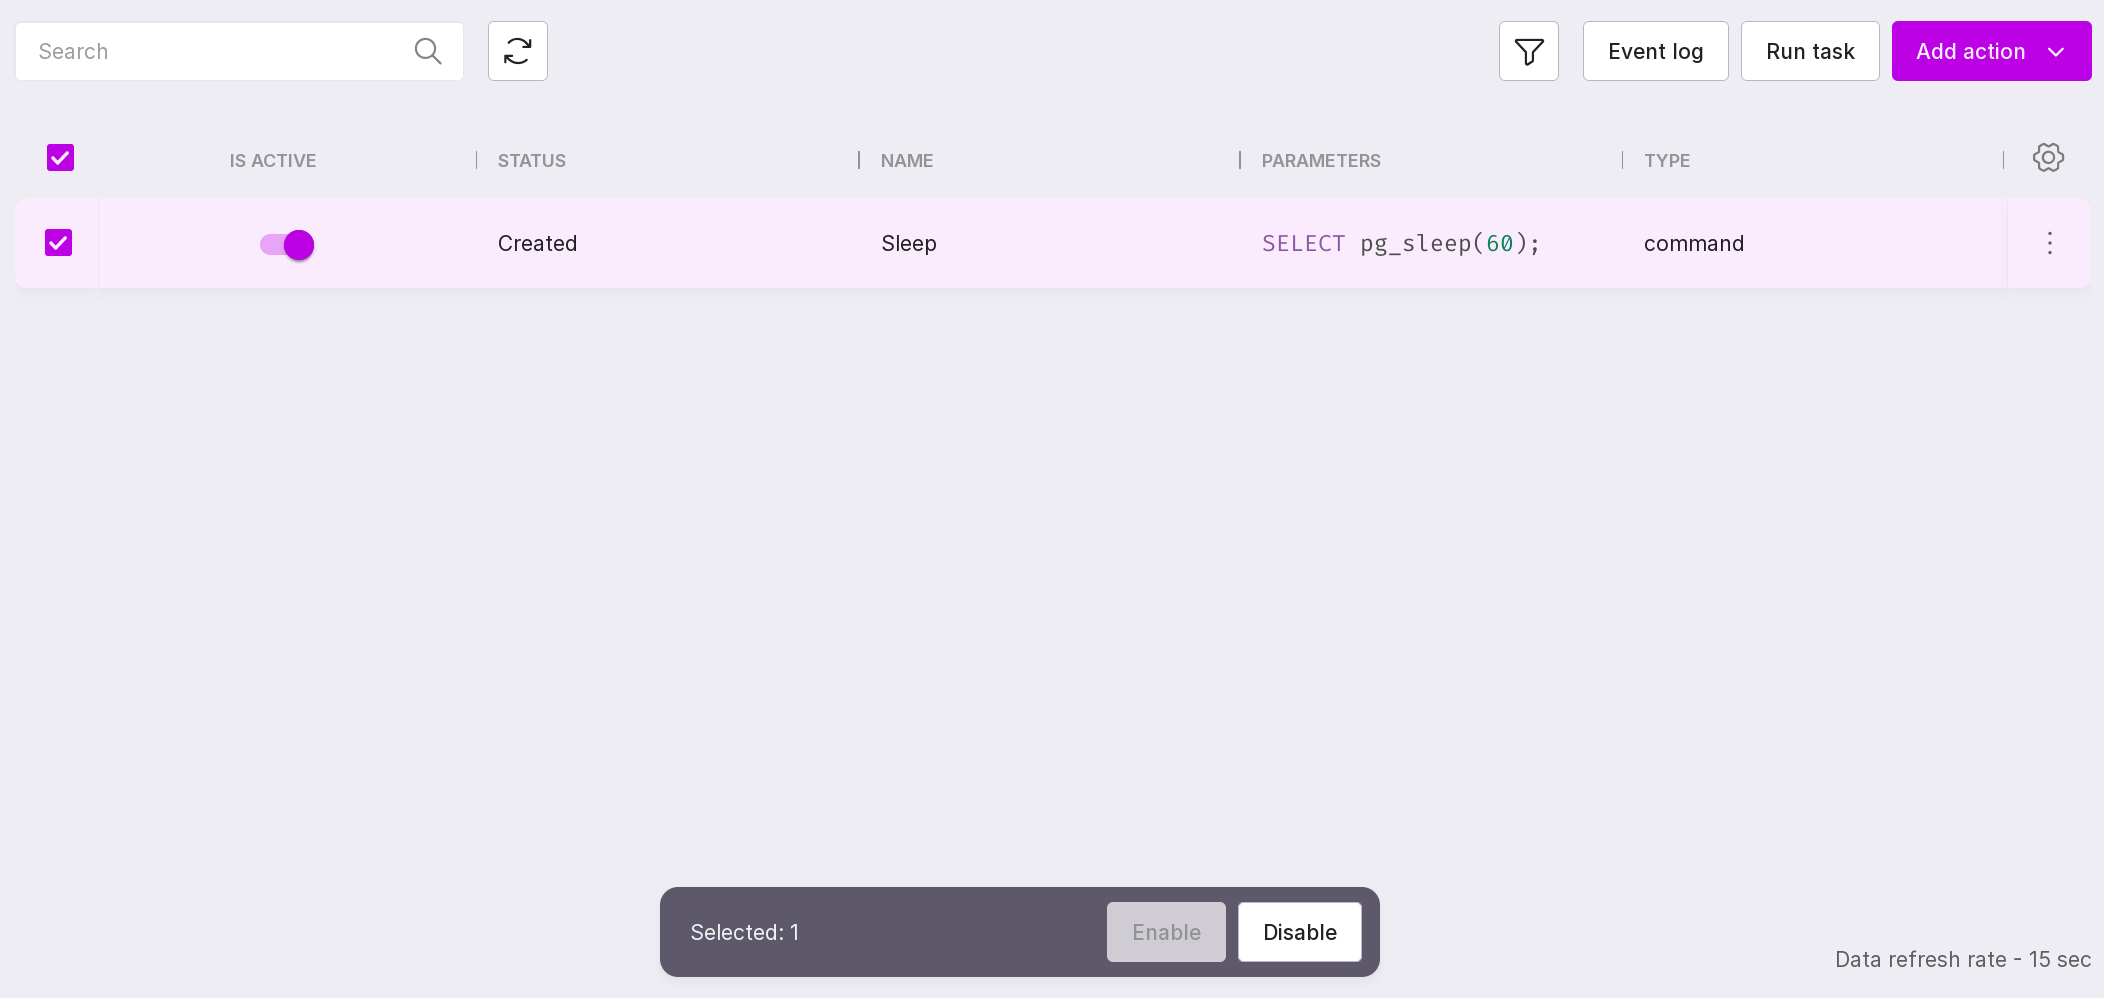
The table displays all information on actions: state, name, parameters, and type of action:

If more than ten actions are added, a pagination setting will appear at the bottom of the page. In the dropdown list, select the number of actions to display on one page.
If you check the checkbox on the left from the action, you will see the options available for actions at the bottom of the screen. To check all actions at once, click the top checkbox.
“Enable” — enables all actions regardless of their current state;
“Disable” — disables all actions regardless of their current state.