Cluster config page
The Cluster Config page allows you to define unified settings for all instances of the cluster at once.
Warning
The user with “Viewer” role has access to this section in read-only mode.
To access this page, either:
Go to the “Clusters” tab in the namespace and click on the row of the required cluster. On the opened page, in the left-hand menu click “Configuration”.
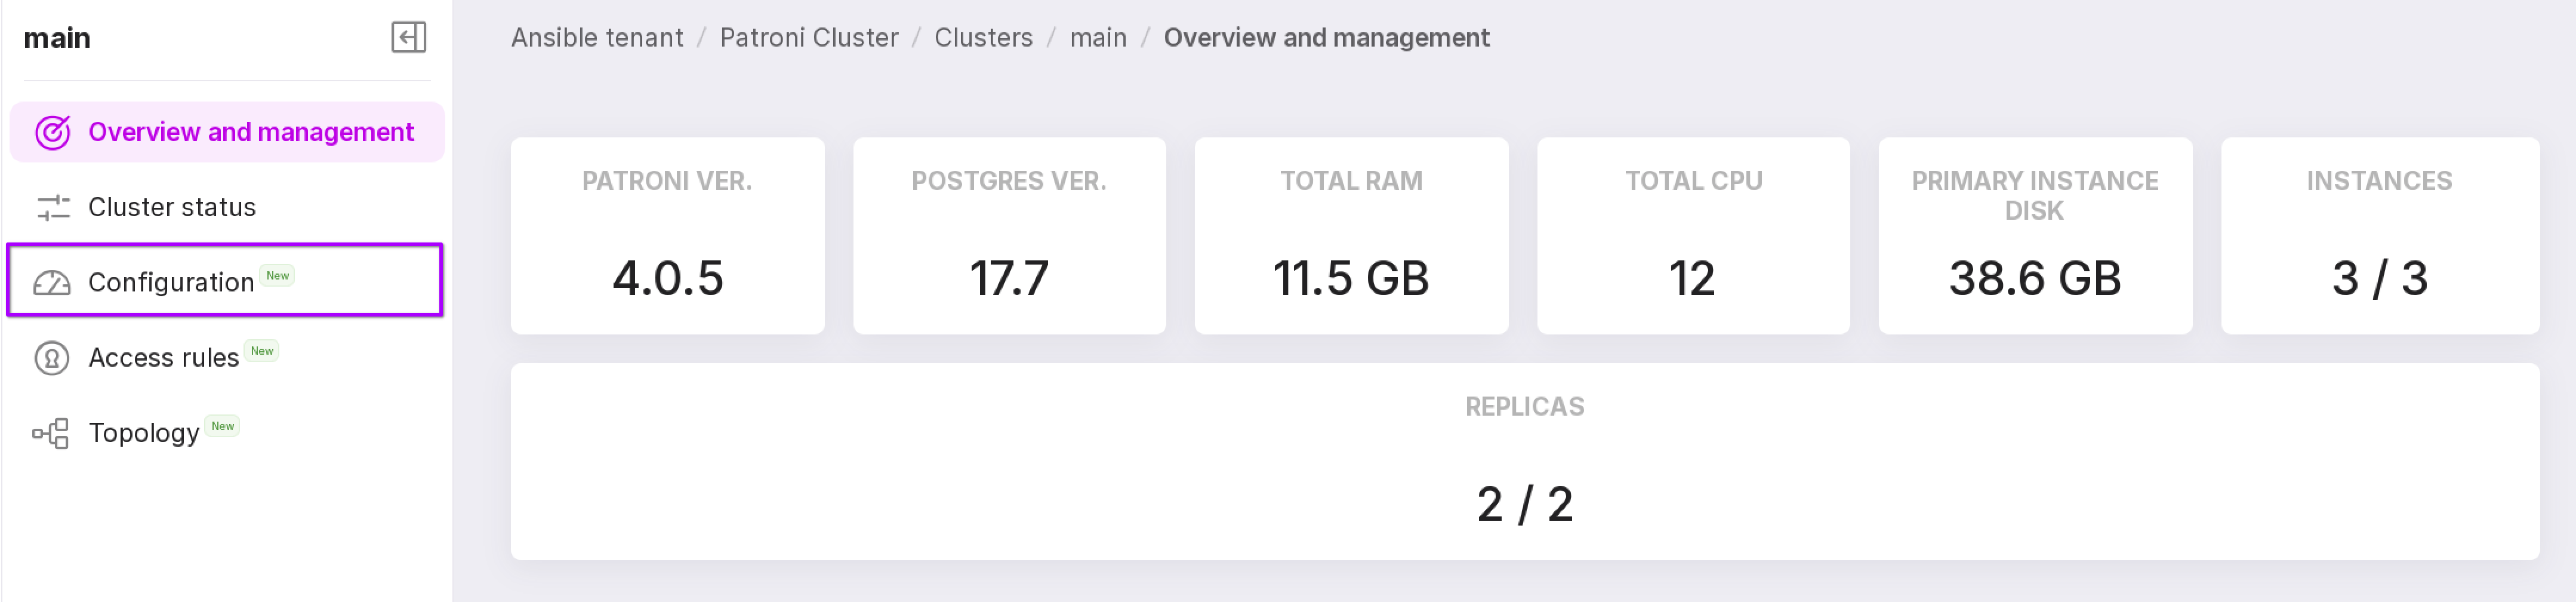
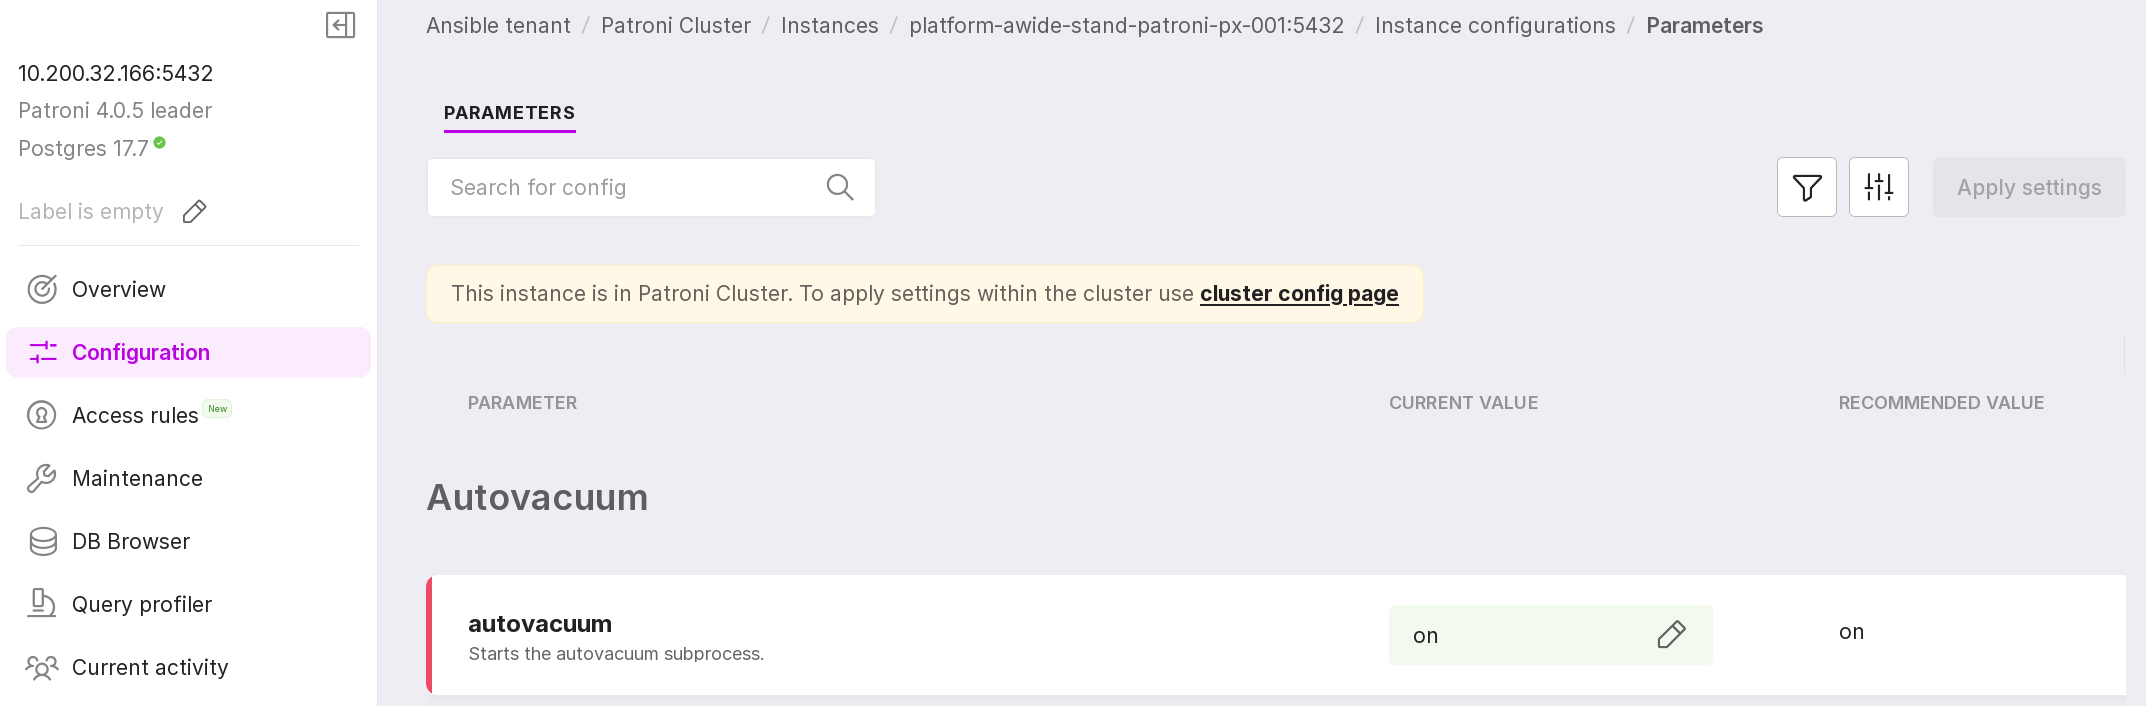
Click on “Configuration” in the left menu panel of the instance. Here you will see the settings of the selected instance. To see the settings of the Patroni cluster, go to “cluster conig page.”
A reminder regarding settings
After navigating to the Cluster Config page, a reminder with information on the cluster configuration will appear on the screen:
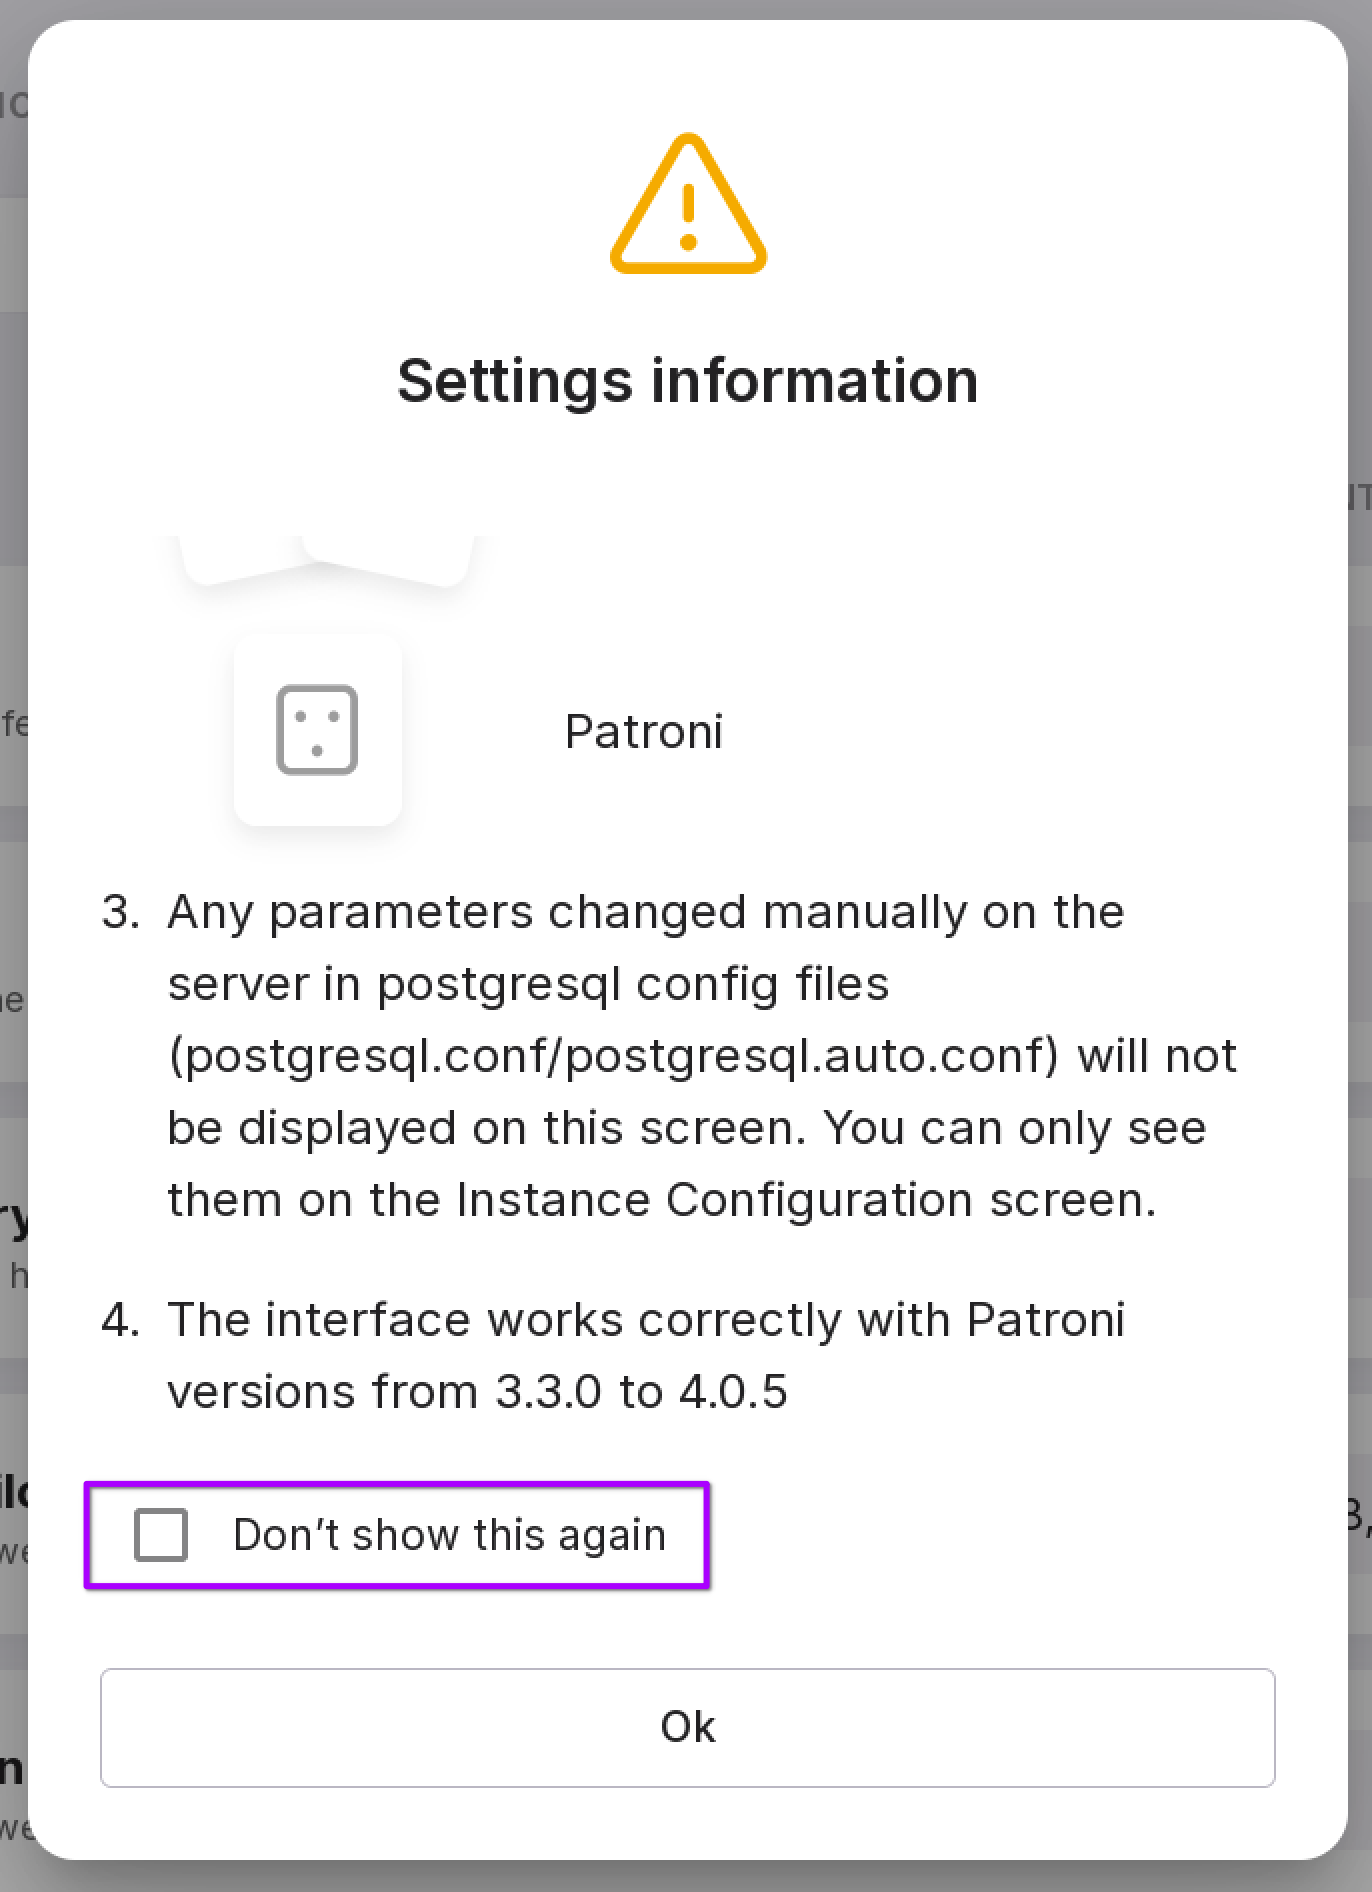
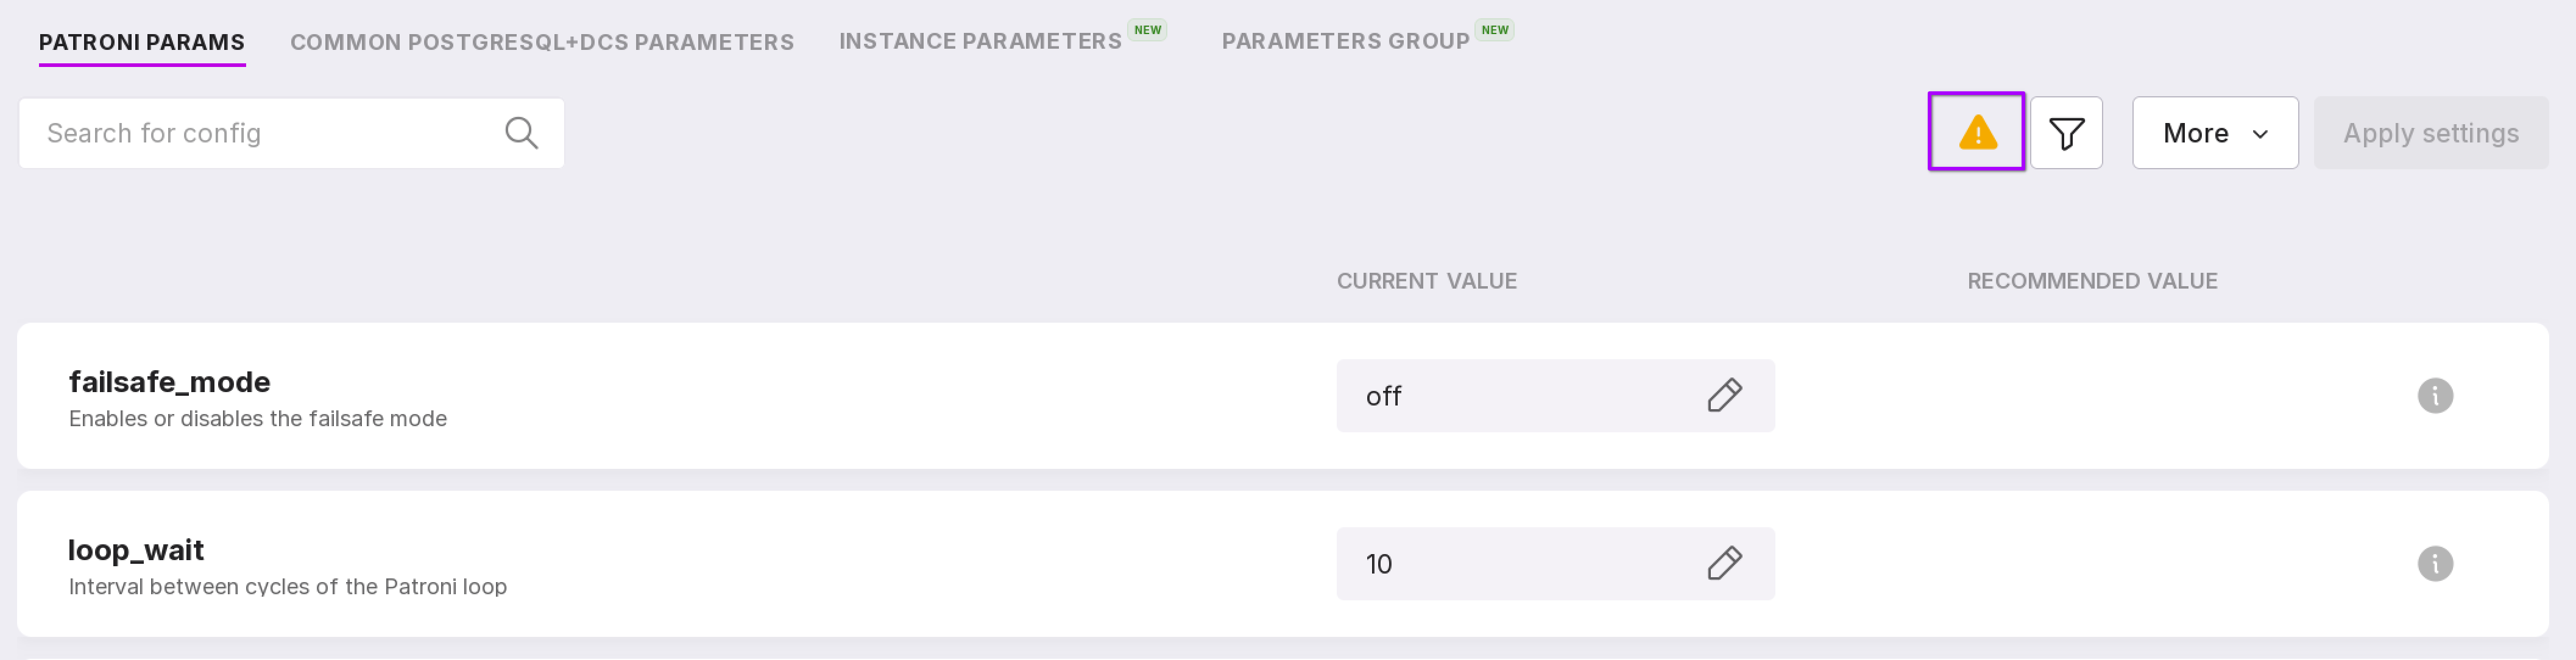
You can check the box “Don’t show this again,” and the reminder will no longer automatically appear when navigating to the screen. After closing the reminder, this information can be viewed on the same page by clicking on the yellow triangular icon.
Configuration options
The page displays parameters controlled by the Patroni cluster and parameters that are the same across all nodes of this Patroni cluster.
Attention
If the values of the same parameters differ across different nodes of the Patroni cluster, Platform interface does not display them. For example, the parameters related to replication will be different: the value of “transaction_read_only” on the replica will be set to On, while on the master it will be Off.
Similarly, the following will be different:
“in_hot_standby”
“primary_conninfo”
“primary_slot_name and others.”
Attention
In Platform, you cannot change parameters whose values are complex data structures, such as arrays or nested JSON/dictionaries. This restriction prevents the input of incorrect values that may lead to the following problems:
non-working Cluster Configuration screen,
inability to connect new Patroni instances within the same cluster.
Patroni parameters that cannot be edited through Platform:
“pg_ident”
“pg_hba”
“ignore_slots”
“slots”
“pause”
“config_file”
“data_directory”
“transaction_read_only”
The Cluster Config page contains the following tabs:
Patroni Parameters — page with Patroni parameters;
Common PostgreSQL+DCS Parameters — page displaying PostgreSQL configuration parameters.
Instance Parameters — page showing parameters whose values differ across cluster instances.
Parameter Group — page containing information on the parameter group assigned to the cluster.
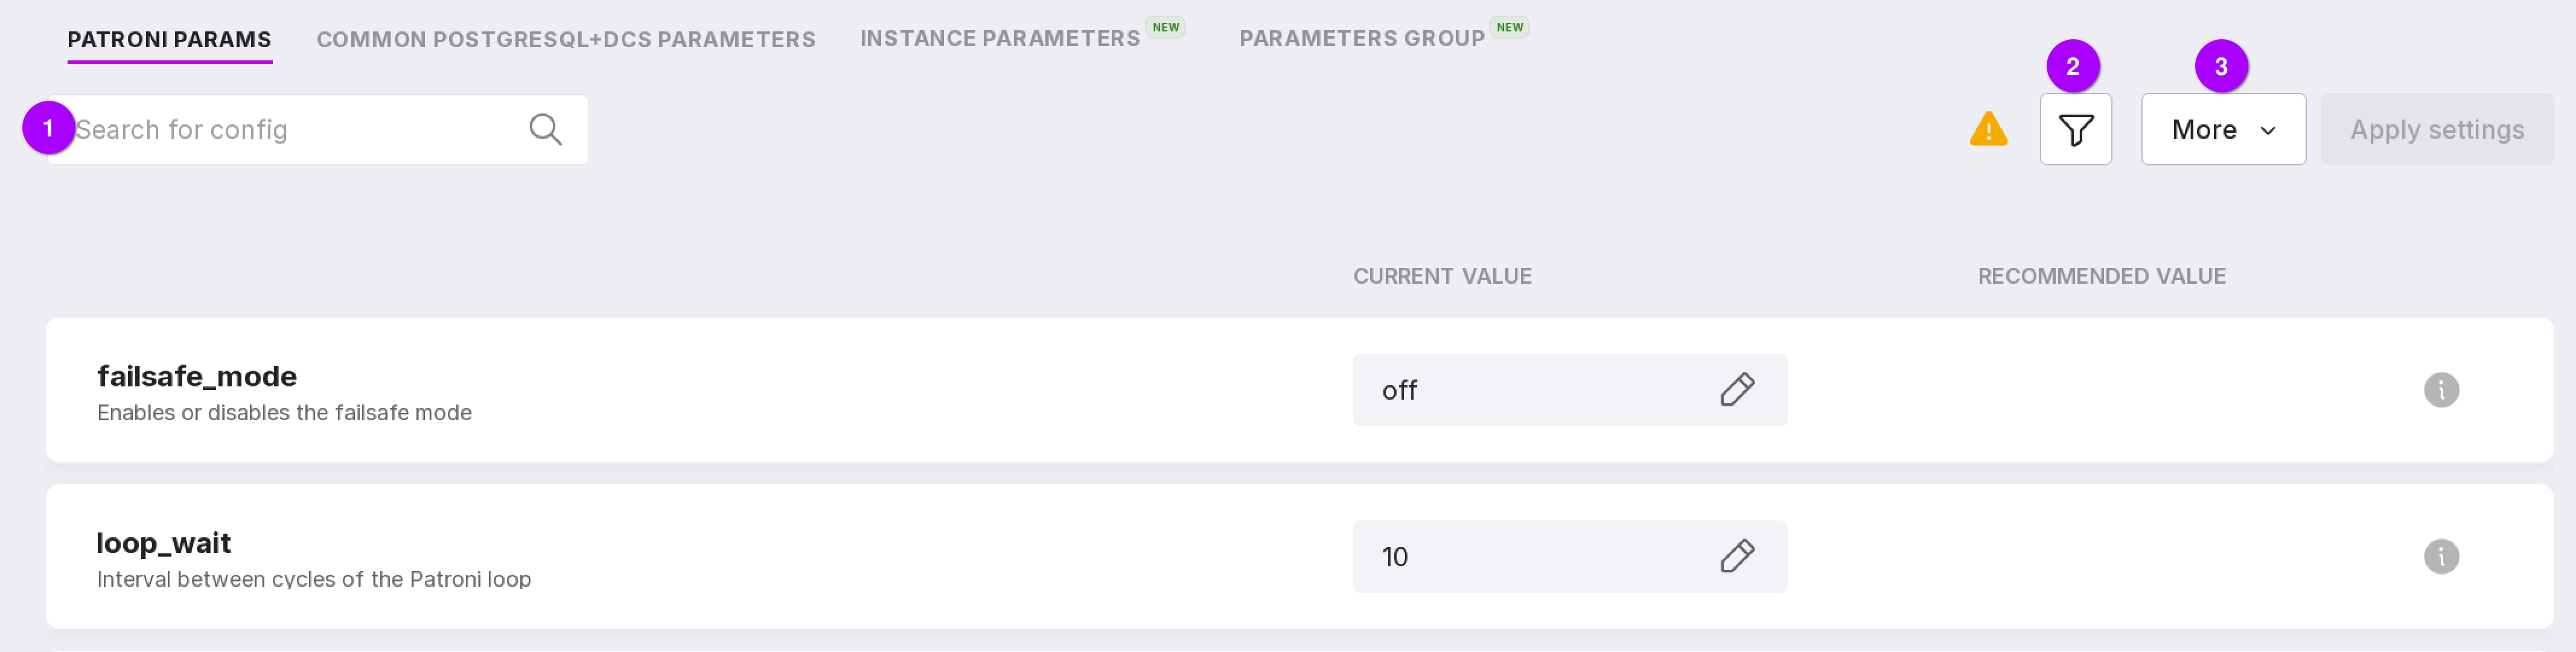
Parameters can be searched by names using the search bar.
Using the filter, parameters can be sorted by specific criteria.
Patroni parameters can be filtered by value state:
Has a recommended value,
Default,
Changed values,
Changed pending reload,
Changed pending restart,
Not applied.
PostgreSQL parameters can be filtered by value state, as well as by the following parameters:
Parameter type:
Patroni only,
PostgreSQL only.
- Category (“Autovacuum”, “WAL Logging”, “Replication”, etc.).
Available categories depend on the DBMS version and build.
Opens a menu that allows you to perform the following actions:
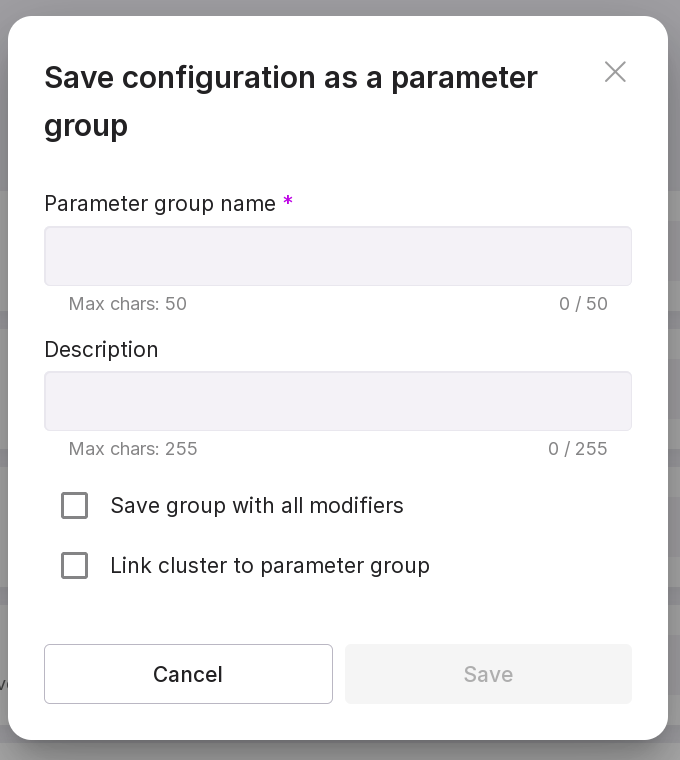
“Save as Group” — opens a dialog to save the current configuration as a parameter group. In the dialog, specify a name and description for the parameter group. If required, check “Link cluster to parameter group” to link the cluster to this group.
“Export to File” — exports the cluster’s configuration to a file. In the dialog, enter a file name, select the format, and click “Export”. If cluster instances have different configurations, parameters with differing values will not be exported.

“Import from File” — uploads a cluster configuration file. In the dialog, select a .json or .conf file and click “Import”. The parameter group from the file will be applied to all instances in the cluster. If any parameters in the file contain invalid values, the file will not be imported. The import dialog will display a list of parameters with invalid values.

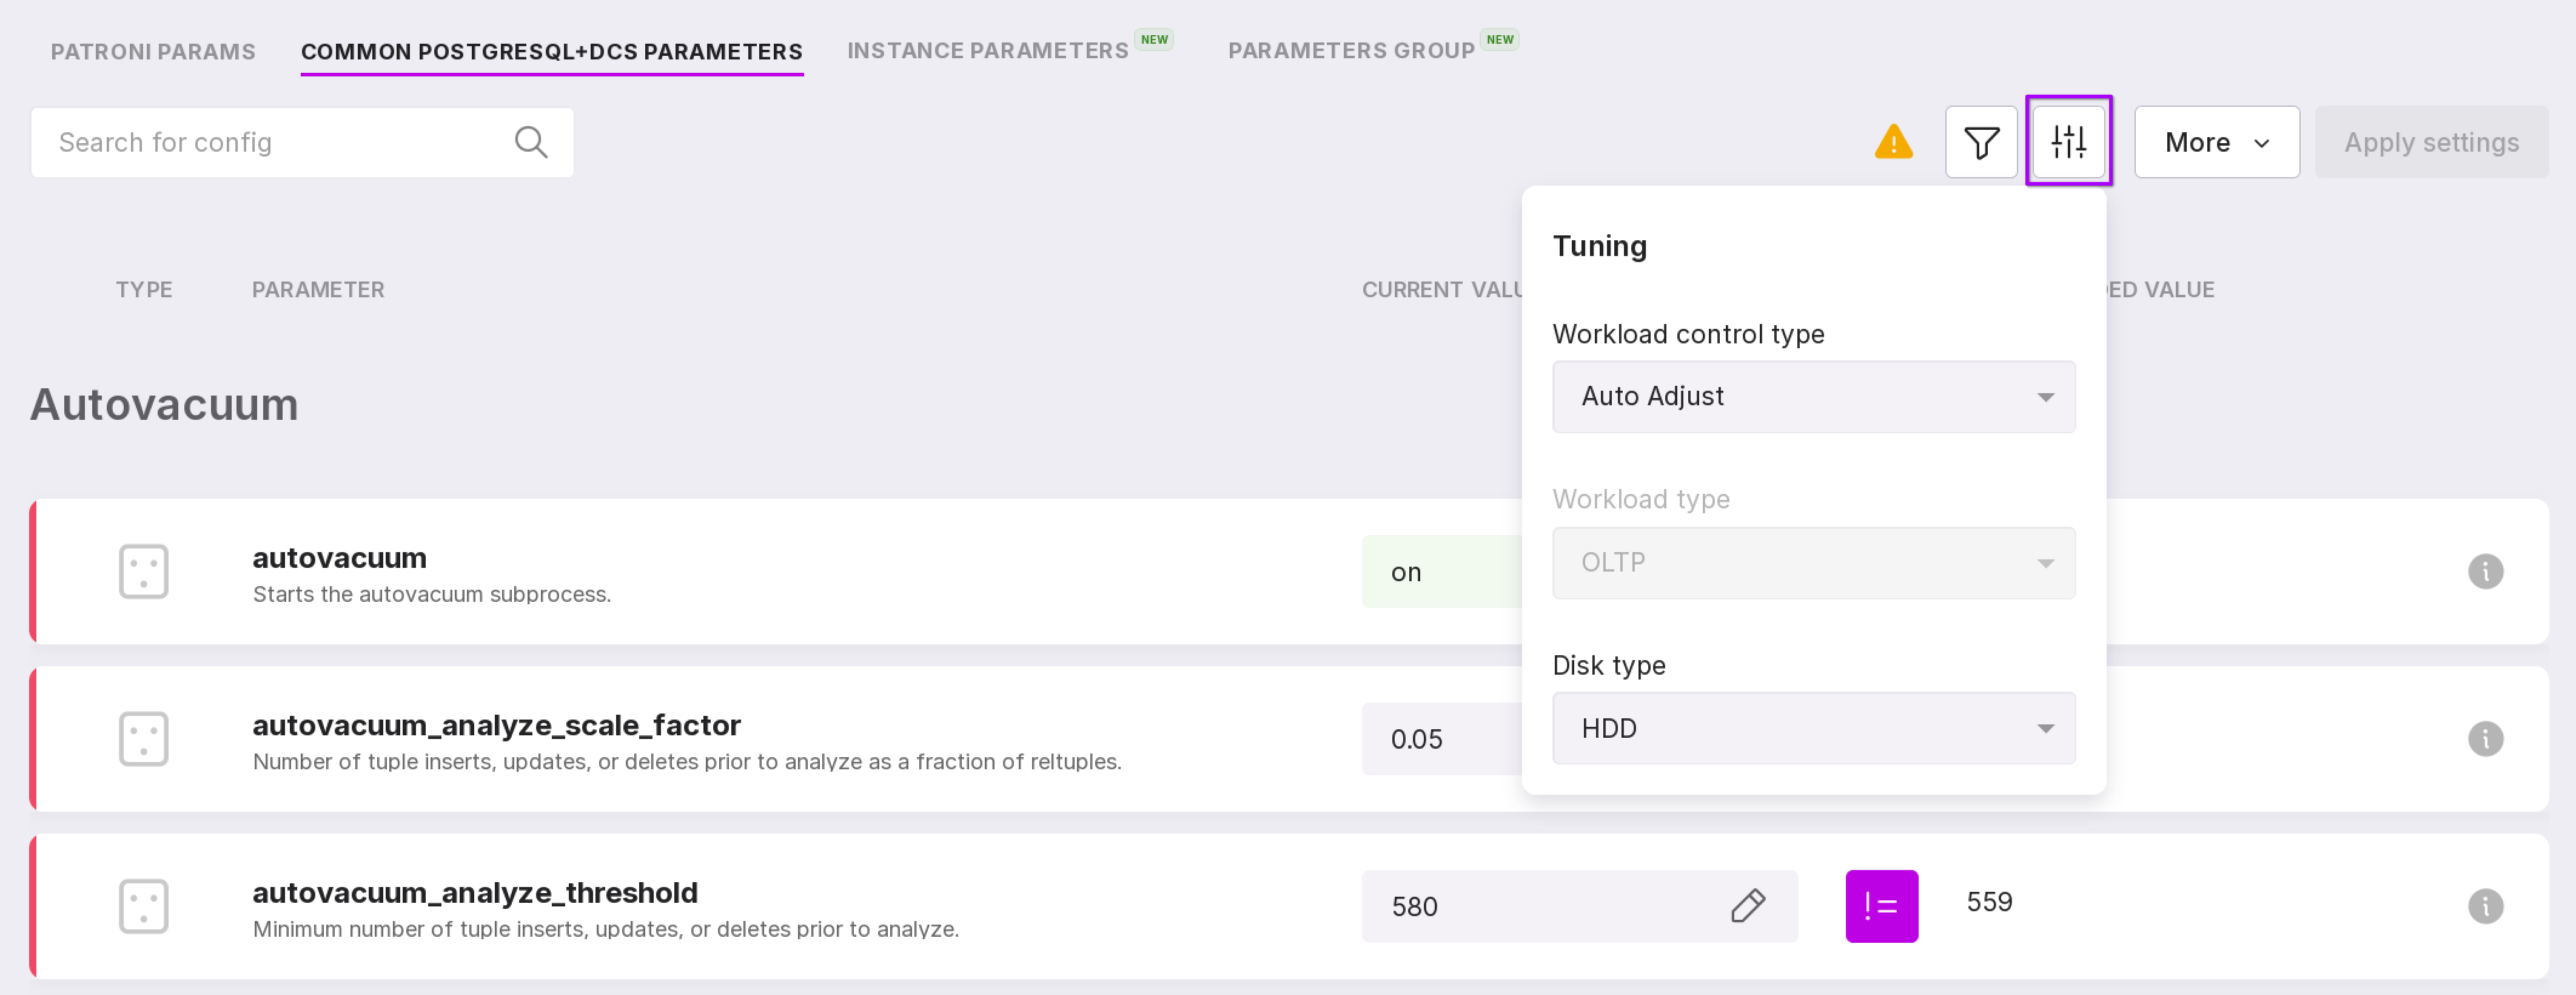
On the “Common PostgreSQL+DCS Parameters” tab, next to the filter icon, there are settings that include the following parameters:
Workload control type:
Manual — The platform automatically selects the load profile of the monitored database. The currently automatically selected profile is indicated in the “Load Type” selector and is not available for modification.
Auto Adjust — allows you to manually choose a specific load profile for a specific database instance using the “Workload Type” selector. For example, for a 1C database, the most effective profile may be the “ERP1C” profile.
Workload type:
OLAP — a load profile typical for analytical systems. Allows executing one-time, but very complex queries using a large number of rows from different schemas and tables of the database.
OLTP — a load profile typical for most applications. Allows executing a large number of transactions in real-time for a greater number of users.
Mixed — suitable for databases with mixed load.
ERP1C — suitable for working with 1C databases.
Disk type:
SSD (“Solid State Drive”),
HDD (“Hard Disk”),
Network storage (“Network Storage”).
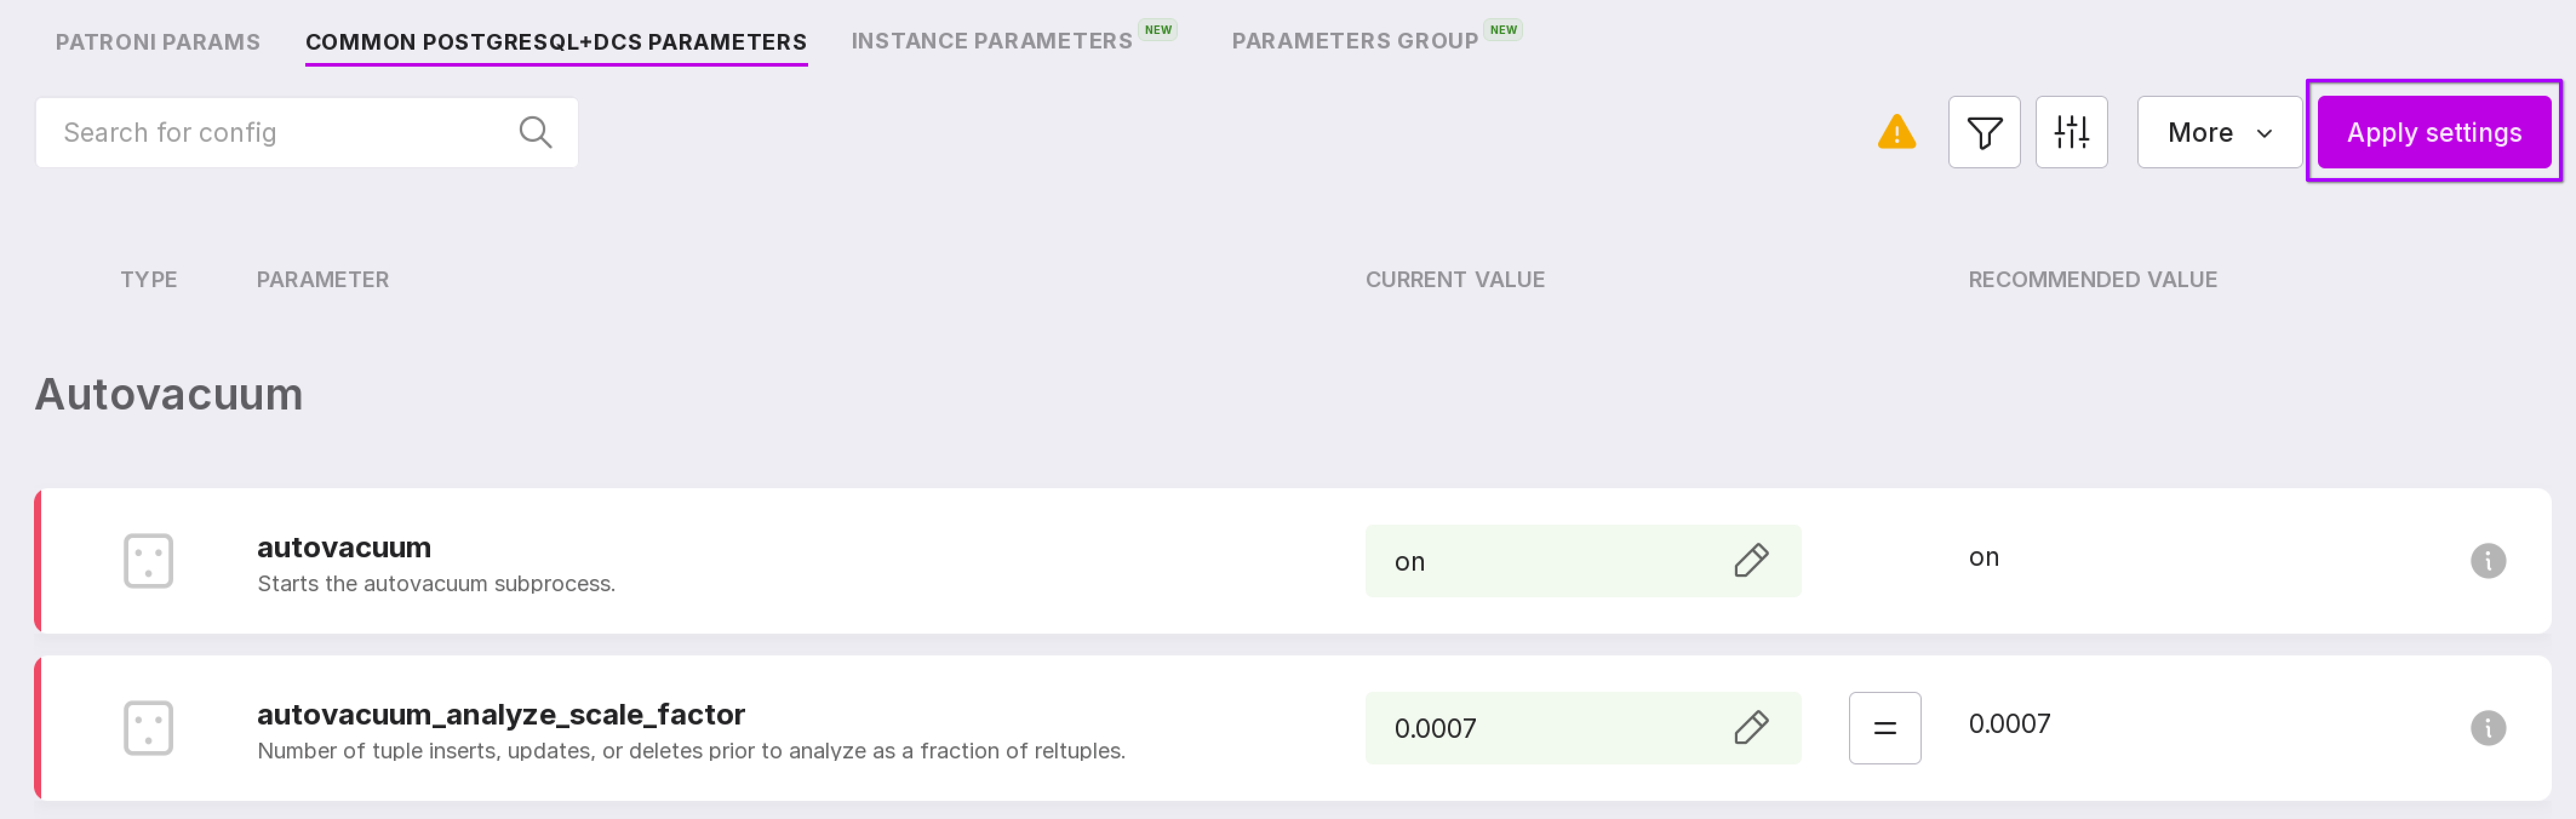
Each parameter has a description. To open it, click on the “i” icon in the row of the required parameter.
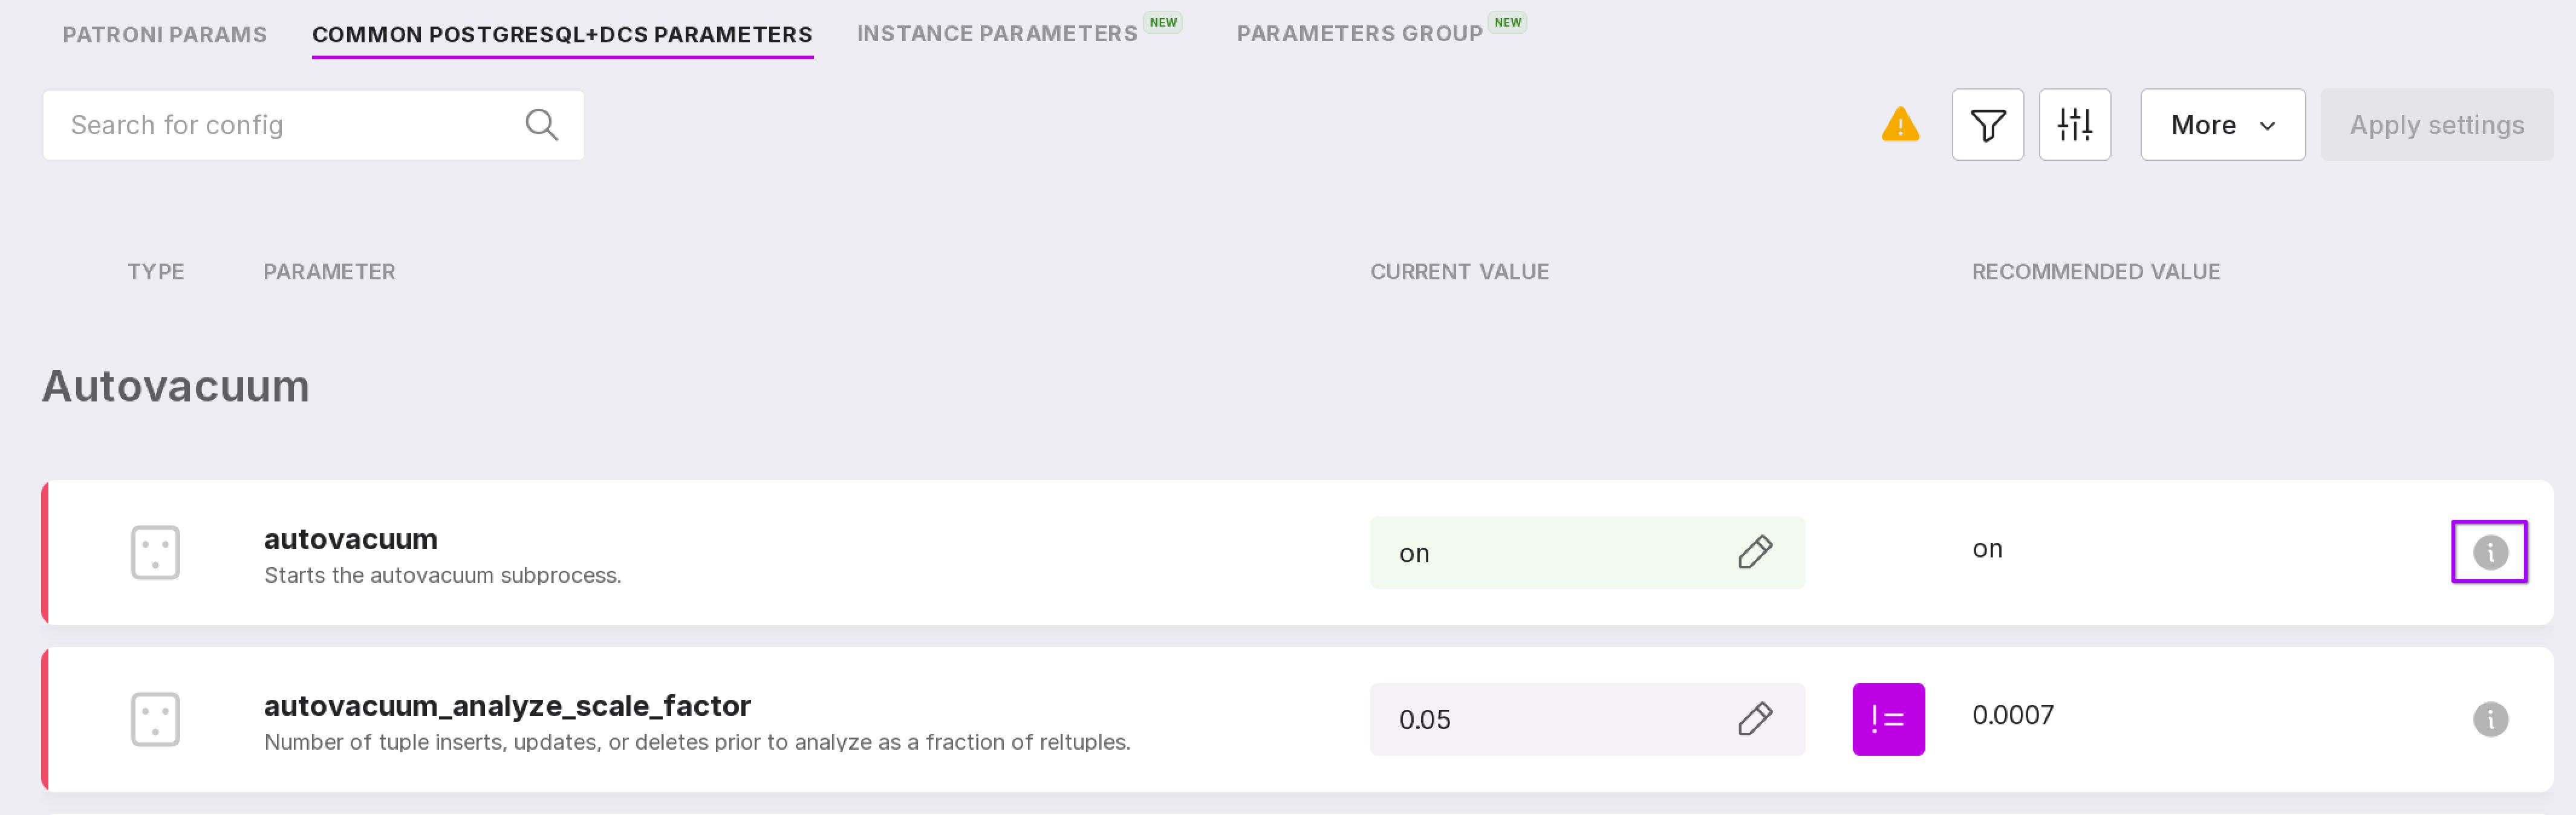
The “Current Value” column shows the parameter values at the moment.
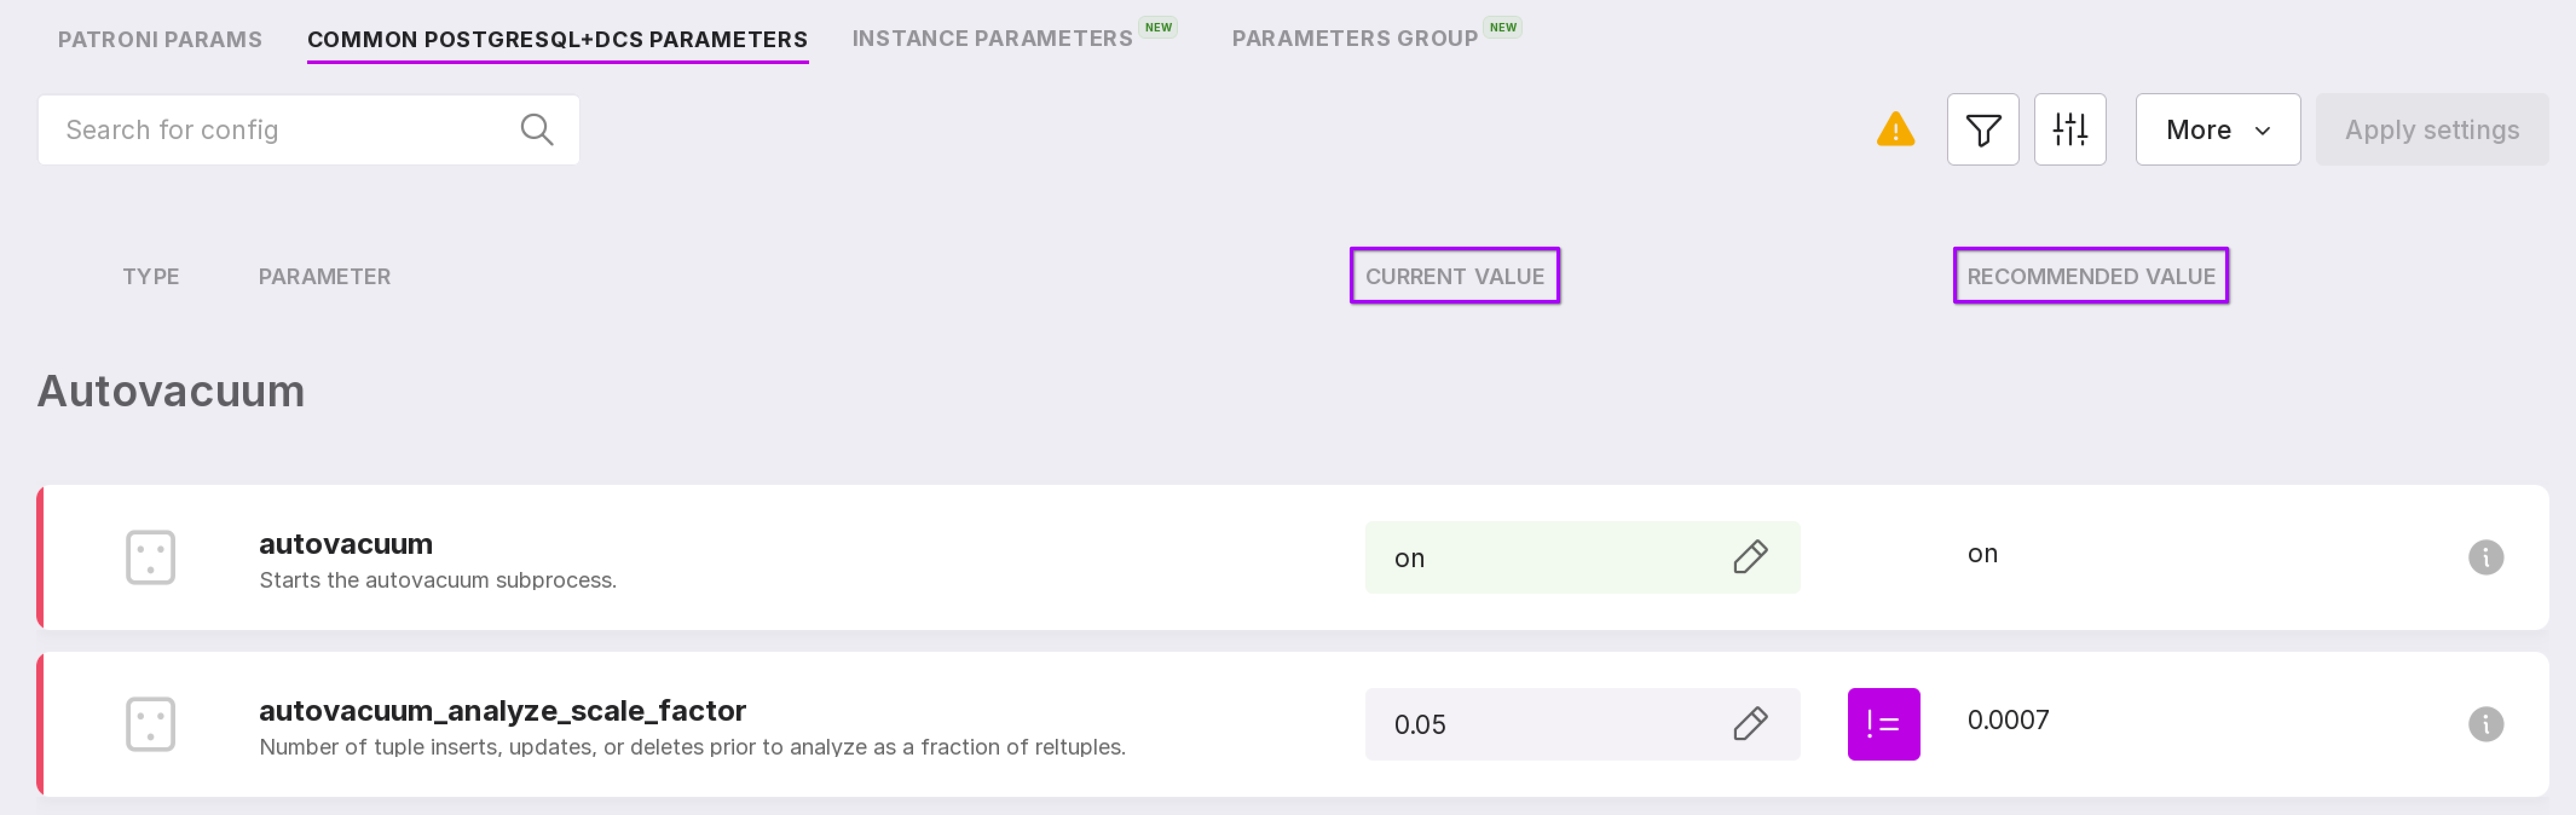
On the “Common PostgreSQL+DCS Parameters” tab, the “Recommended Value” column shows the recommended parameter values for configuration. There may be icons of two types on the left:
“=” — means that the current parameter value matches the recommended one. When this button is pressed, the current parameter value will be replaced with the last manually changed value that is not equal to the recommended one.
“!=” — means that the current parameter value does not match the recommended one. When this button is pressed, the current parameter value will be replaced with the recommended one.

The system administrator or a User with namespace administration rights can enter the required parameter themselves. To do this, you need to click the pencil shaped button, which will open the parameter editting window.
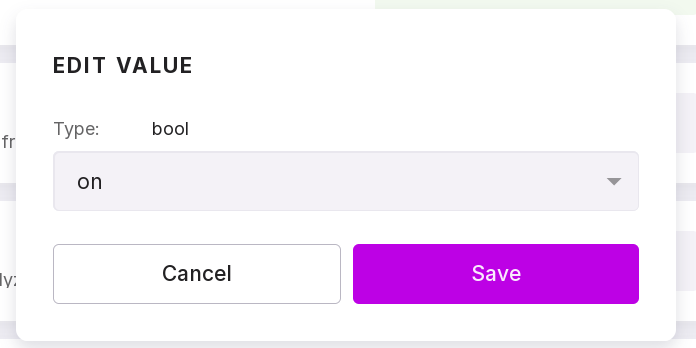
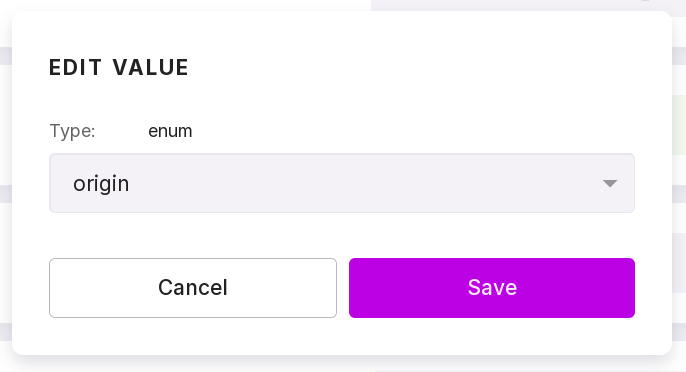
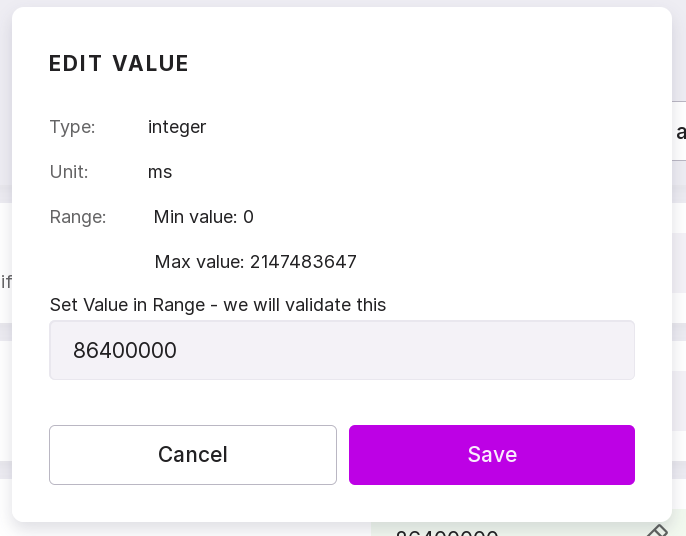
There are four types of windows for editting parameters:
Boolean type parameters have two value options: on and off.
For enumeration type parameters, the value can be selected from a dropdown list.
For numeric parameters, you can manually specify numbers from the valid range.
String parameters can be represented by any text value.
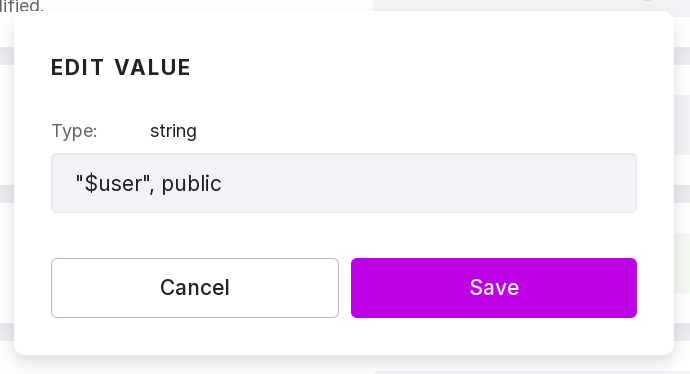
After changing each parameter, you can click “Save” to save the change or “Cancel” to discard the change.
If you have changed parameter values, click “Apply settings” to save the changes. After that, a window will appear with a complete list of changes.
This window displays the following information:
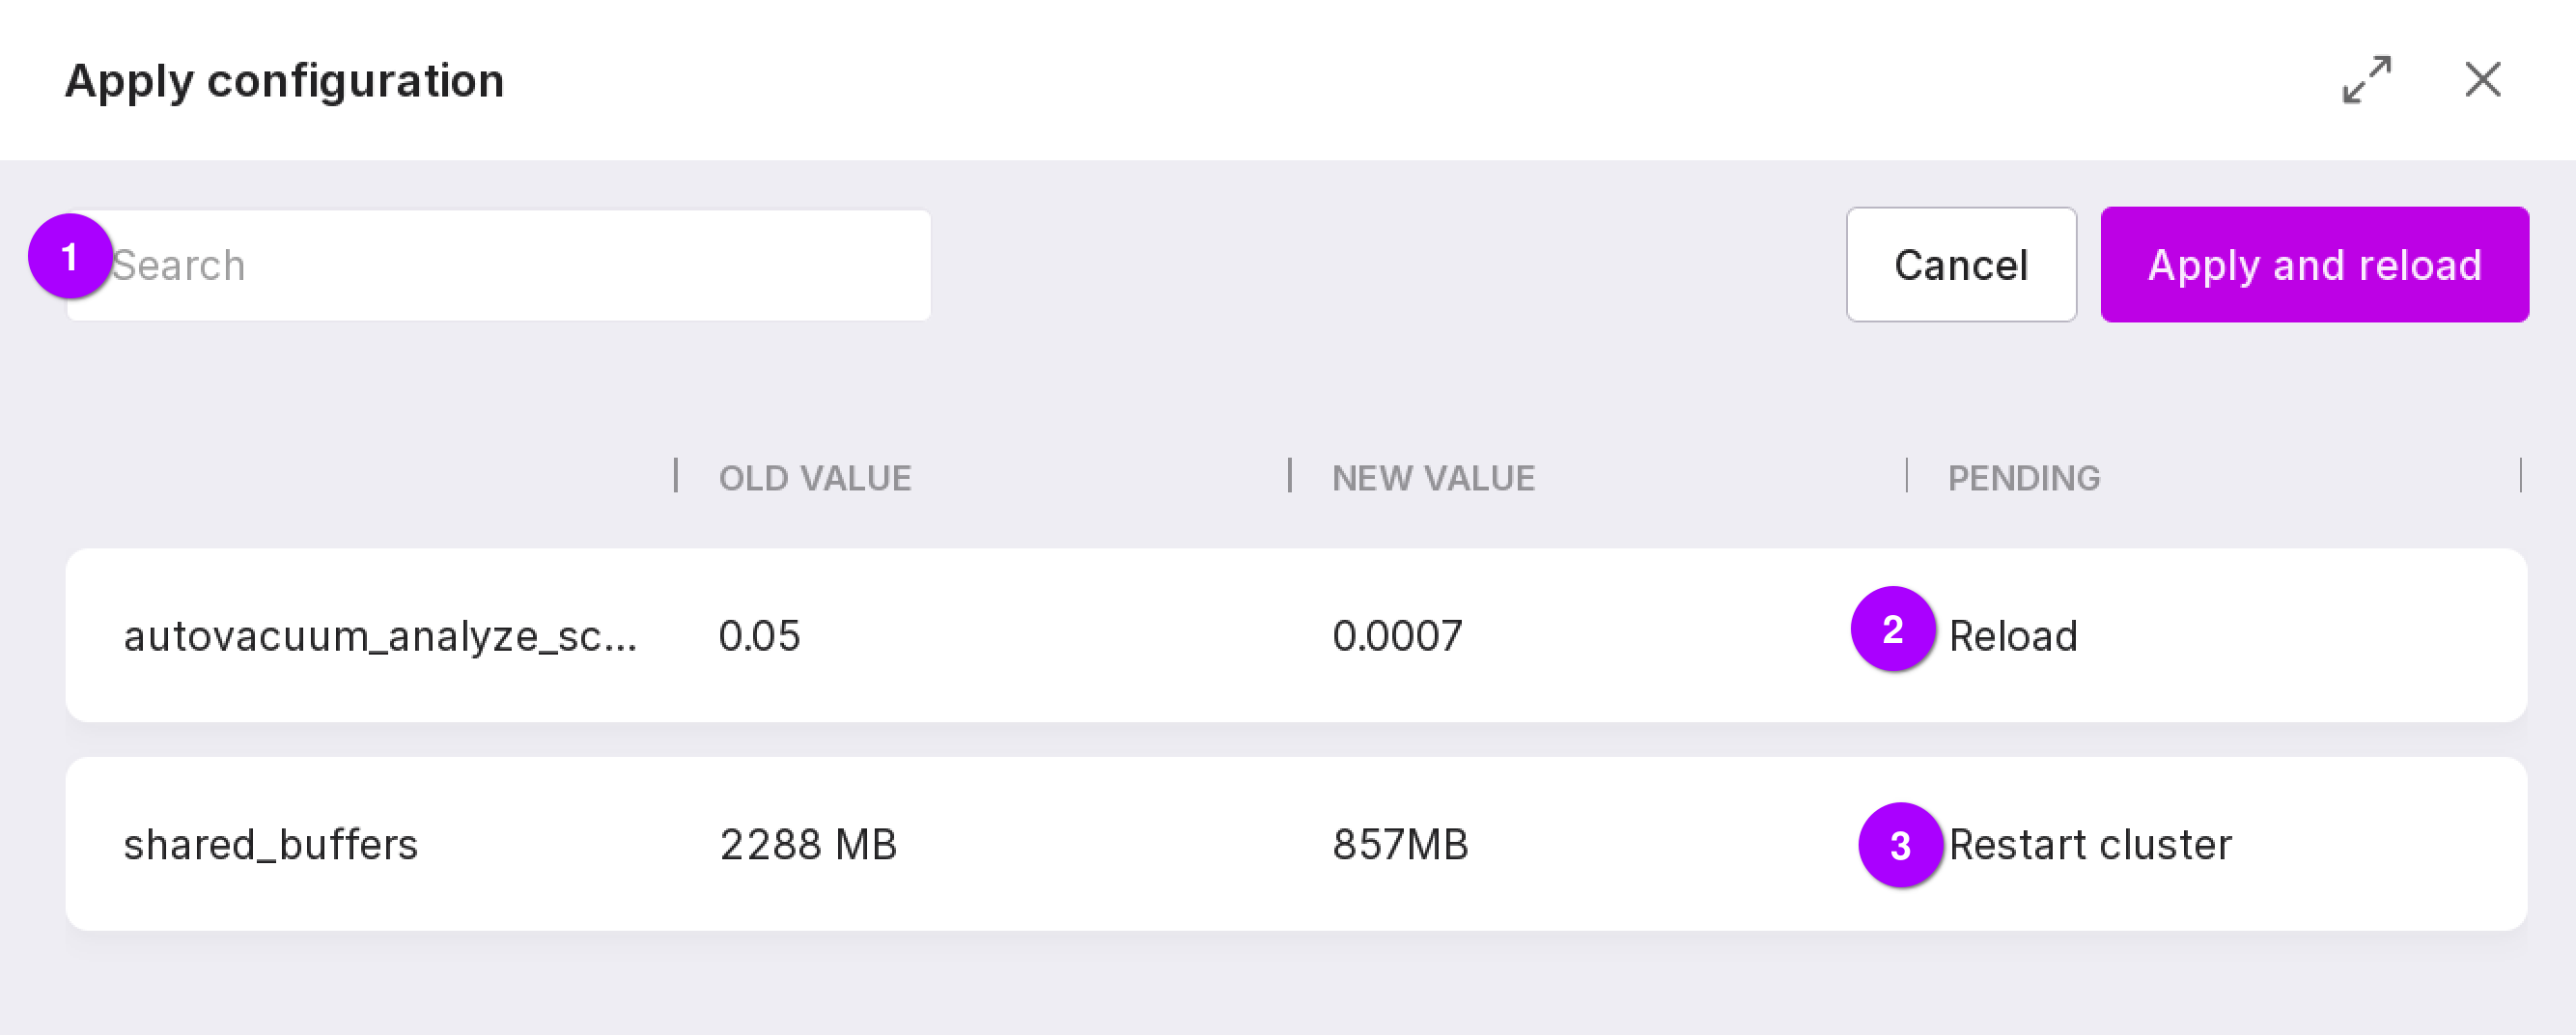
Search bar that allows you to search for parameters by name.
If the value expects a re-read of the configuration file, it will be applied automatically after clicking “Apply and Reload.” In this case, no downtime is expected.
If the value requires a cluster restart, click “Apply and Reload”, then restart the Postgres cluster using the command line window.
After applying the changes, a notification will appear with a link that navigates to the cluster’s instances list.
Instance Parameters
The “Instance Parameters” tab displays parameters whose values differ across cluster instances.
Below is a description of the information presented on this tab:
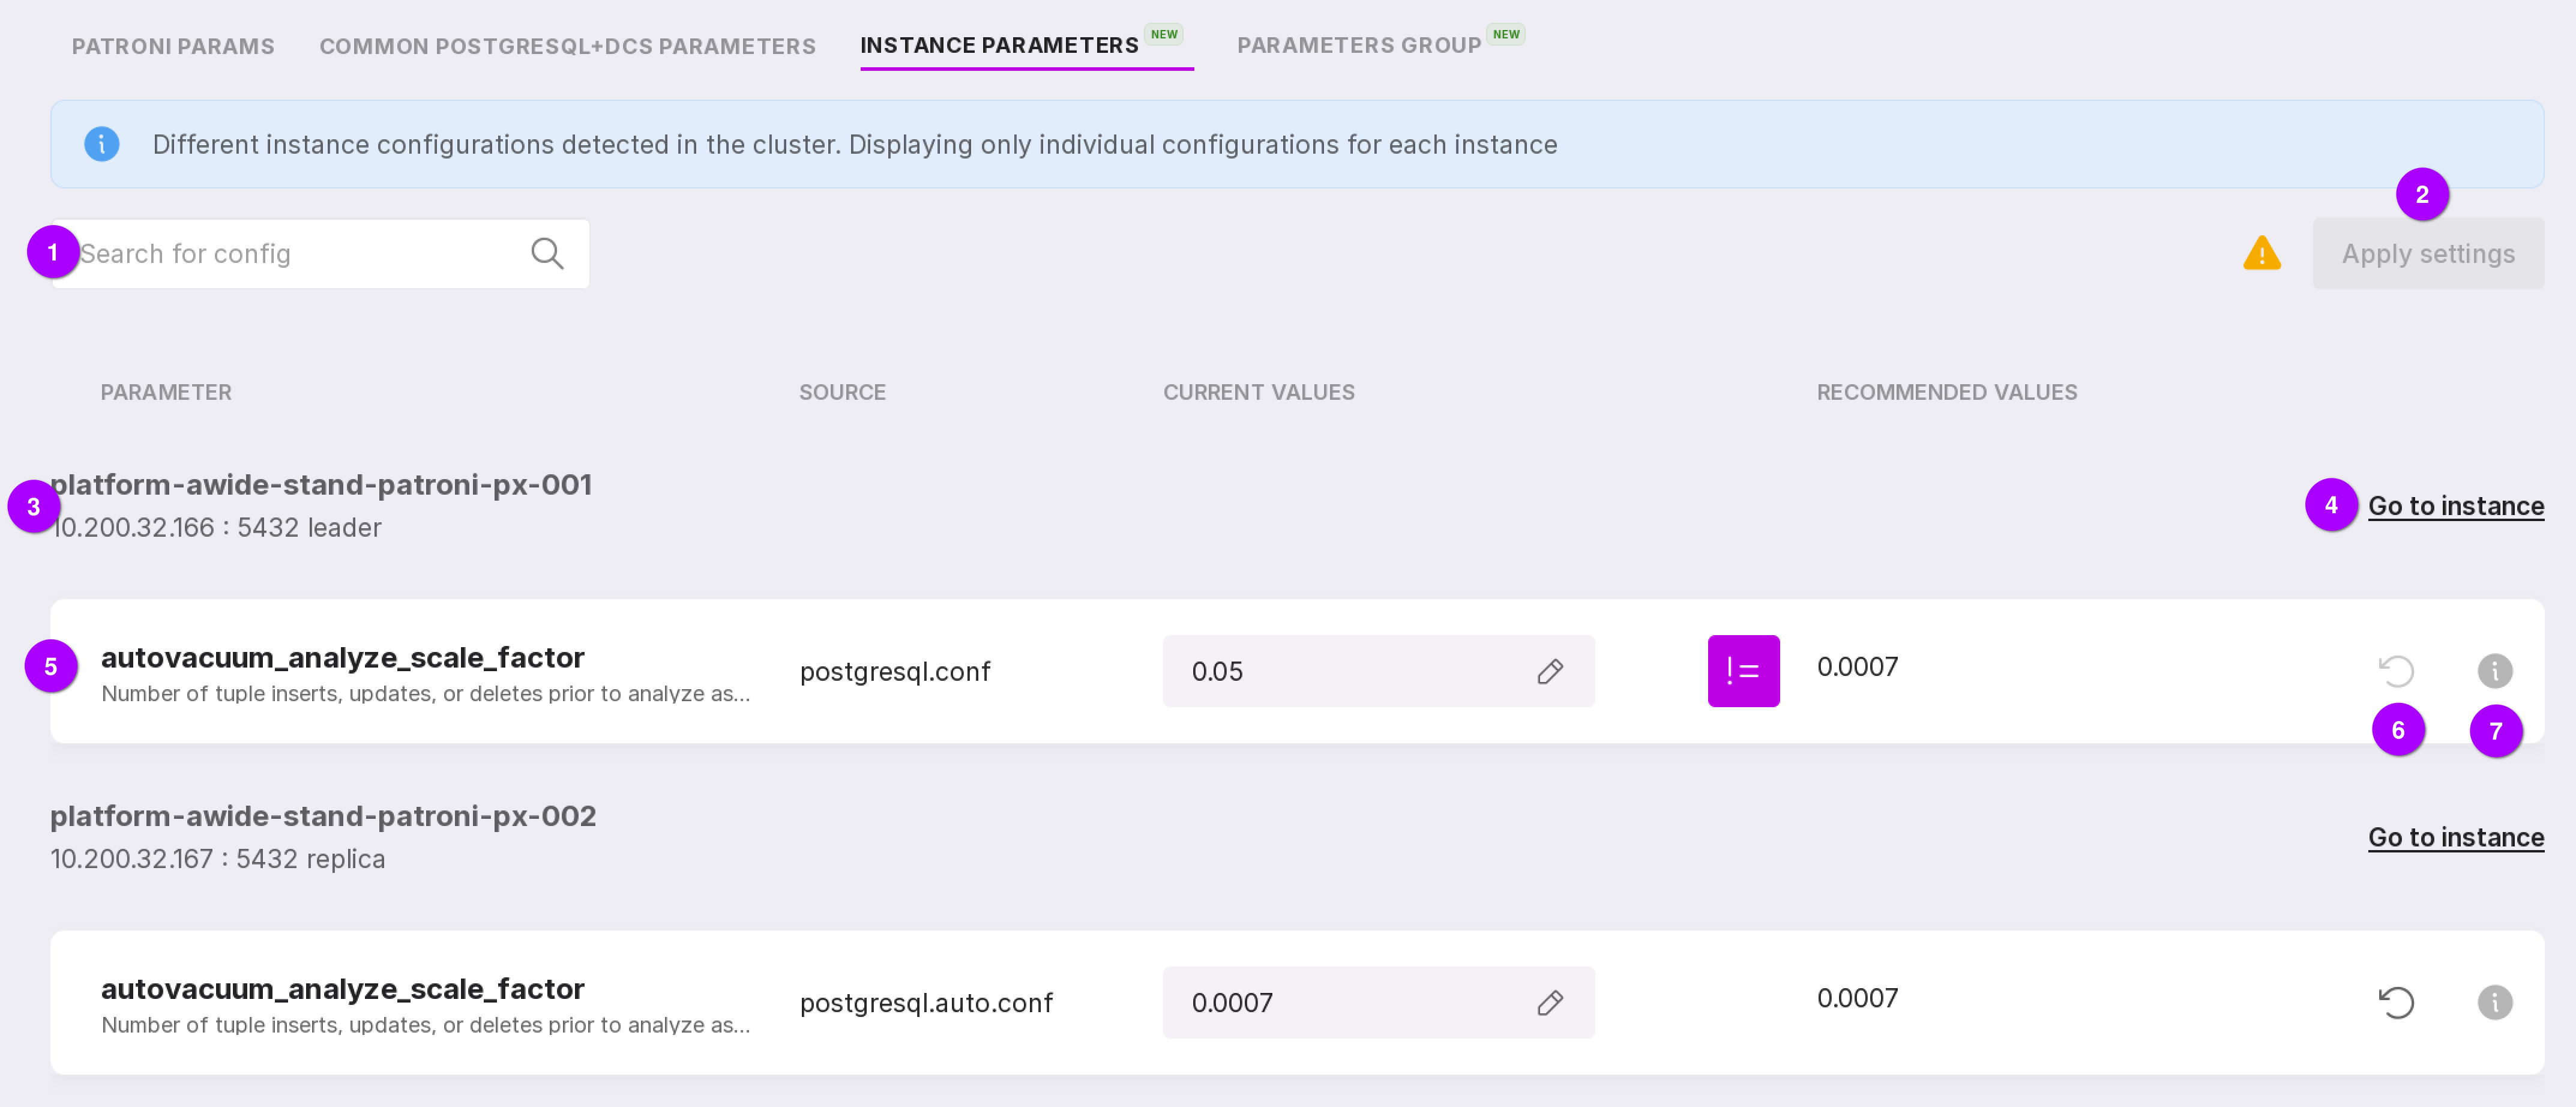
A search field allowing you to look up parameters by name.
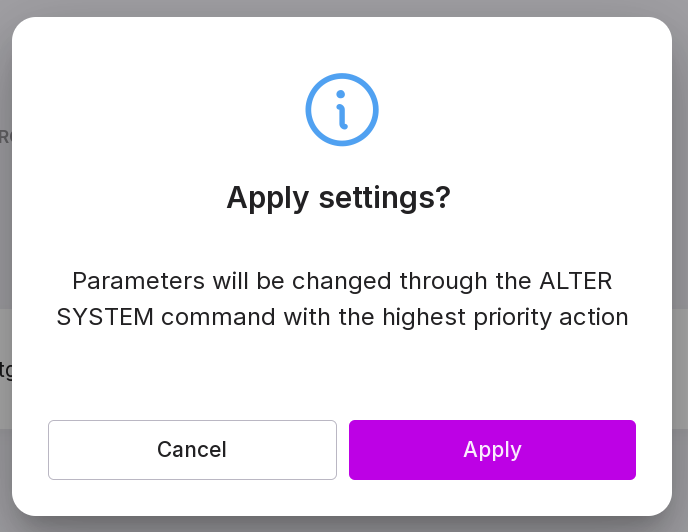
To save changes made on this tab, click “Apply Settings”. In the confirmation dialog, click “Apply”. Parameters will be changed through the ALTER SYSTEM command .
Instance information: node name, IP address, port, and role.
To navigate to the instance’s “Configuration” page, click “Go to Instance”.
Parameter details: name, description, source of the current value, current value, and recommended value.
This button allows you to reset the parameter to its default value if it was previously modified via ALTER SYSTEM.
This button opens a dialog with the full parameter description.
Parameter Group
The “Parameter Group” tab displays information on the parameter group and modifiers linked to the cluster.
See Parameter Groups for more details.